Getting Started with TellR: AI-Powered Slides from Databricks
Generate presentation-ready slides from the Bakehouse sample dataset using TellR
TellR
Databricks Apps
AI
Tutorials
Learn how to install and use TellR, an agentic Databricks App that turns your data into interactive slide decks through natural language.
Modified
31/01/2026
NoteScreenshots & Video
All the code in this tutorial post is rendered against a Databricks workspace before publication. A video walkthrough is also provided for your convenience.
Summary
TellR is an open-source Databricks App that generates interactive slide decks from your data using natural language
You’ll install TellR, connect it to the Bakehouse sample dataset in Unity Catalog, and create your first presentation
We’ll create a custom DailyDatabricks slide style and a profile that ties together a Genie space, style, and deck prompt
TellR queries your data through Genie spaces, respecting Unity Catalog permissions automatically
Slides are rendered as interactive HTML with Chart.js visualizations and can be exported to PDF
Video Walkthrough
What is TellR?
TellR is an agentic application that generates presentation-ready slides from enterprise data through conversational interaction. It runs as a Databricks App and integrates with Genie spaces to query live, governed data.
Key features:
Conversational slide creation — Describe what you want in plain English and TellR builds the deck
Genie integration — Queries your data through Genie spaces, so your slides reflect real, up-to-date numbers
Unity Catalog security — All data access respects your existing permissions; no data leaks outside governance boundaries
Interactive visualizations — Generates Chart.js-based charts that are interactive in the browser
Custom slide styles — Define your own branding with colours, typography, and layout rules
Profiles — Bundle a Genie space, slide style, and deck prompt into a reusable configuration
Iterative editing — Refine slides with follow-up prompts like “add a Q3 comparison” or “change the chart to a bar graph”
Prerequisites
Before you begin, make sure you have:
A Databricks workspace with Apps enabled
Permission to create a Lakebase (or an existing schema you can use)
Access to the Bakehouse sample dataset in Unity Catalog (available by default in most workspaces)
On Behalf Of (OBO) authentication enabled for Databricks Apps (see Step 1 for details)
The Bakehouse Dataset
The Bakehouse dataset is a sample dataset available in Unity Catalog. It models a bakery franchise business with sales, customers, suppliers, and reviews.
Table
Description
sales_transactions
Fact table with individual sales records
sales_customers
Customer dimension table
sales_franchises
Franchise/store location details
sales_suppliers
Product supplier information
media_customer_reviews
Customer feedback and ratings
media_gold_reviews_chunked
Processed review data for analytics
TipFinding the Dataset
In your Databricks workspace, navigate to the Catalog Explorer and look under samples > bakehouse. If you don’t see it, your workspace administrator may need to enable sample datasets.
Let’s explore the tables to get familiar with the data:
# Browse the bakehouse schemaspark.sql("SHOW TABLES IN samples.bakehouse").show()
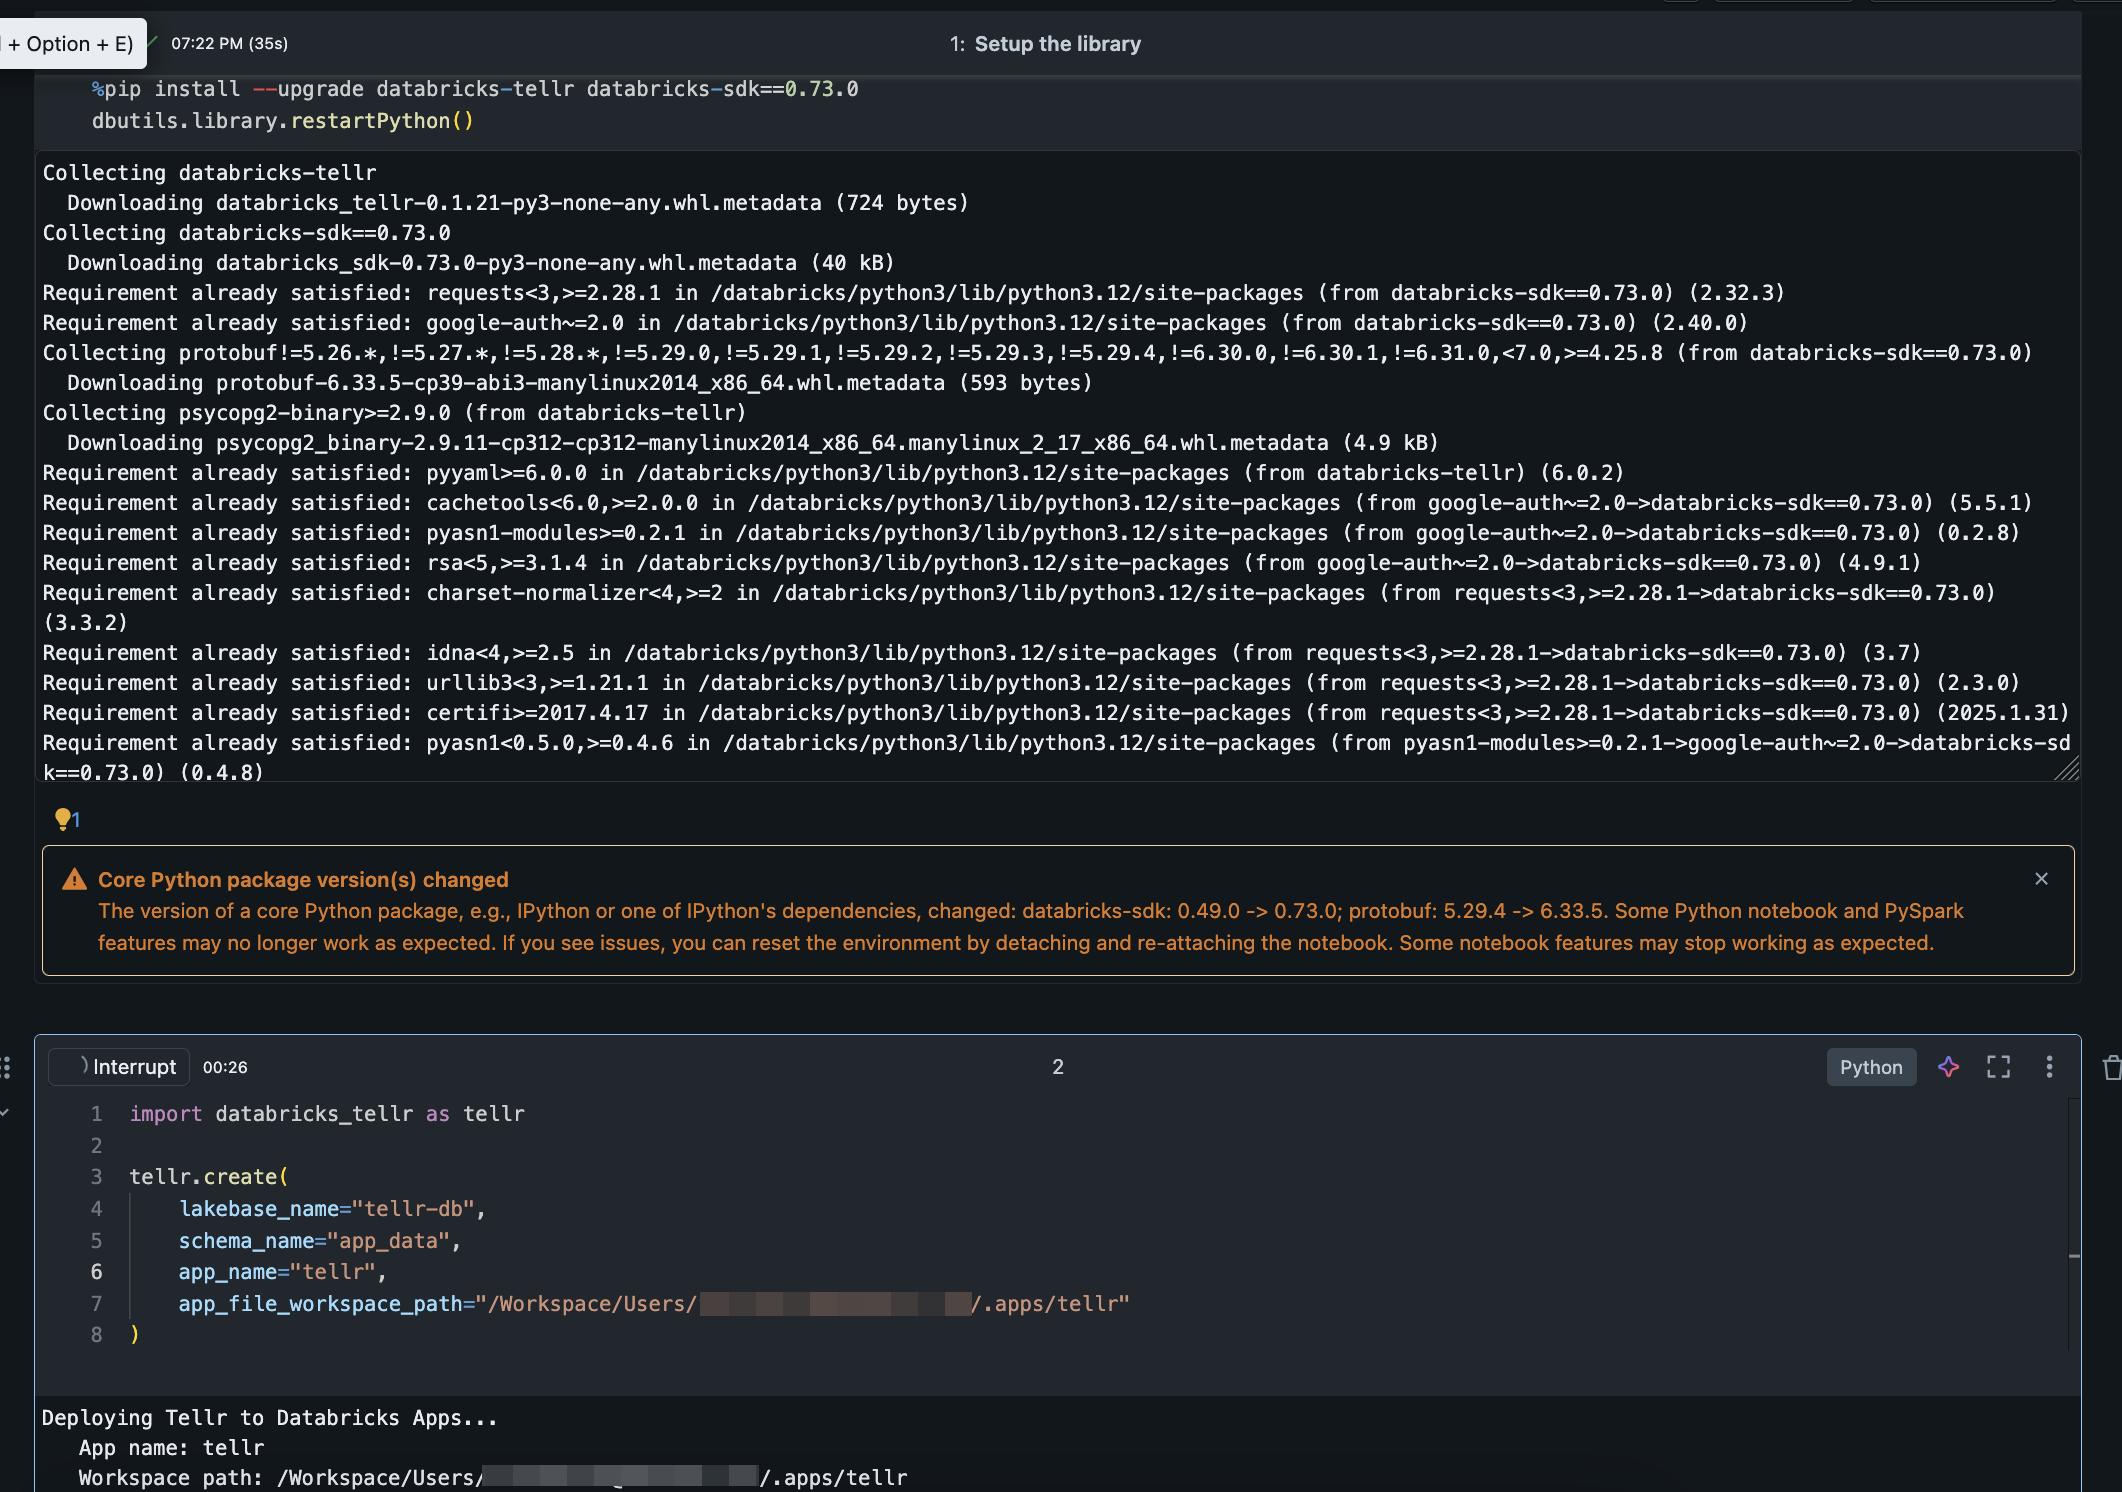
import databricks_tellr as tellrtellr.create( lakebase_name="tellr-db", schema_name="app_data", app_name="tellr", app_file_workspace_path="/Workspace/Users/you@example.com/.apps/tellr")
NoteWorkspace Path
Replace you@example.com with your actual Databricks username. This is the workspace path where TellR’s application files will be stored.
WarningDeployment Error: Token Passthrough Not Enabled
You may encounter this error during deployment:
Deployment failed: Databricks Apps - user token passthrough feature
is not enabled for organization <org_id>.
Config: host=<workspace_url>, auth_type=runtime
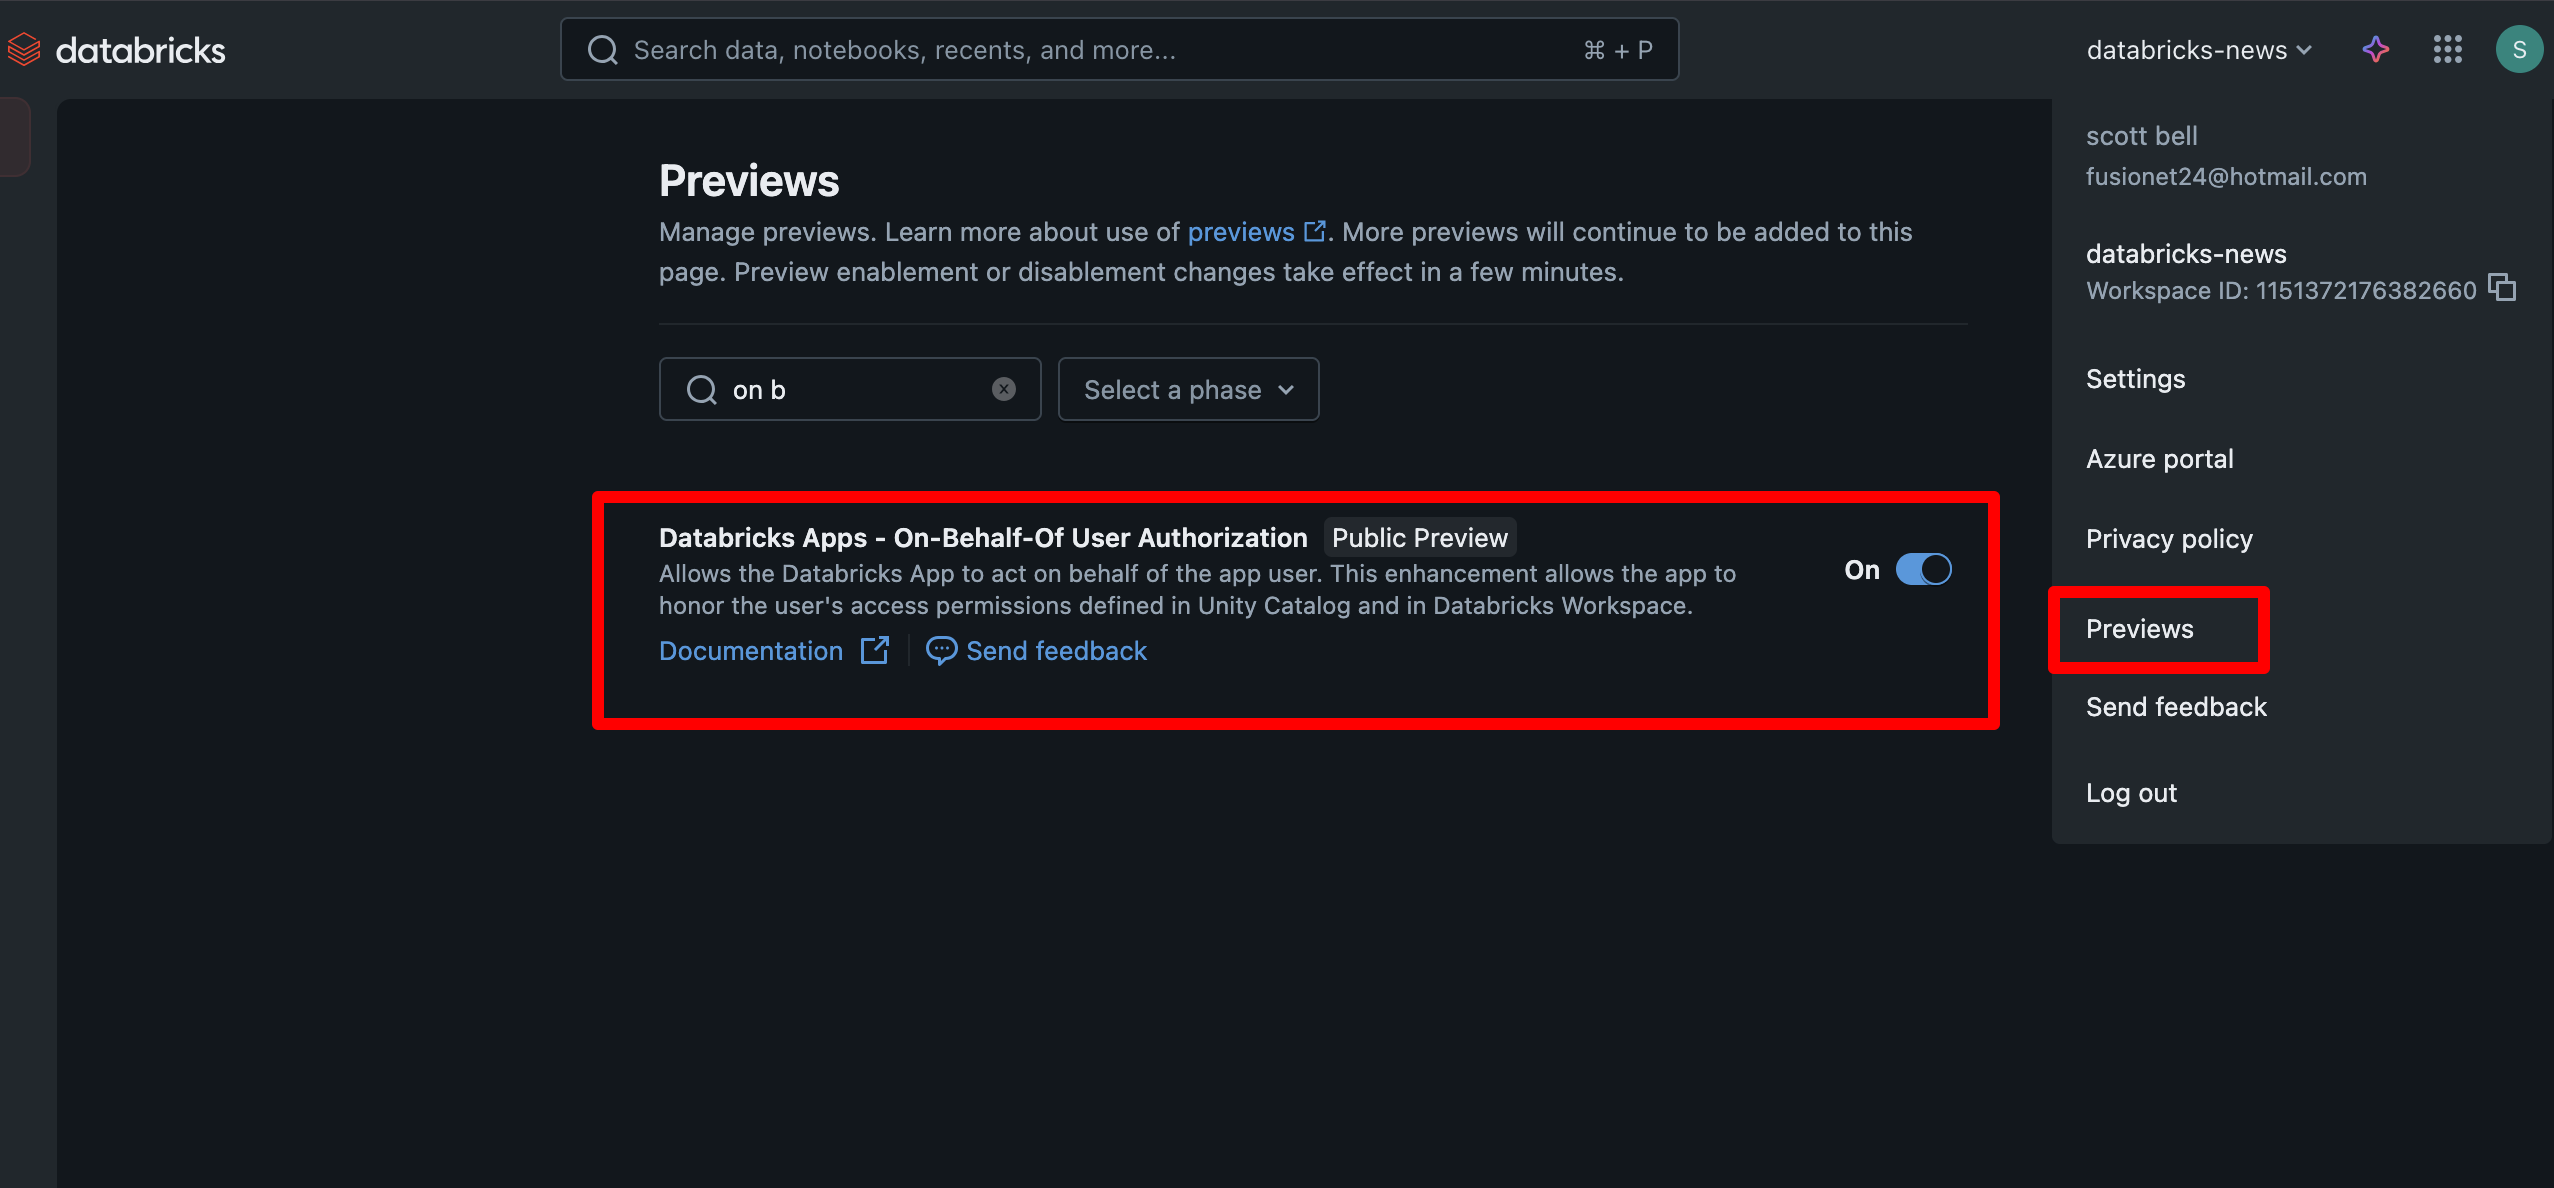
This means On Behalf Of (OBO) authentication is not enabled for your workspace. Databricks Apps require this feature so the app can act on behalf of the logged-in user when accessing data through Unity Catalog.
To resolve this, a workspace administrator needs to enable the On Behalf Of auth setting for Databricks Apps. See the screenshot below for where to find this in the admin console.
Enabling On Behalf Of authentication for Databricks Apps
Installing TellR in a Databricks notebook
Step 2: Verify the Lakebase
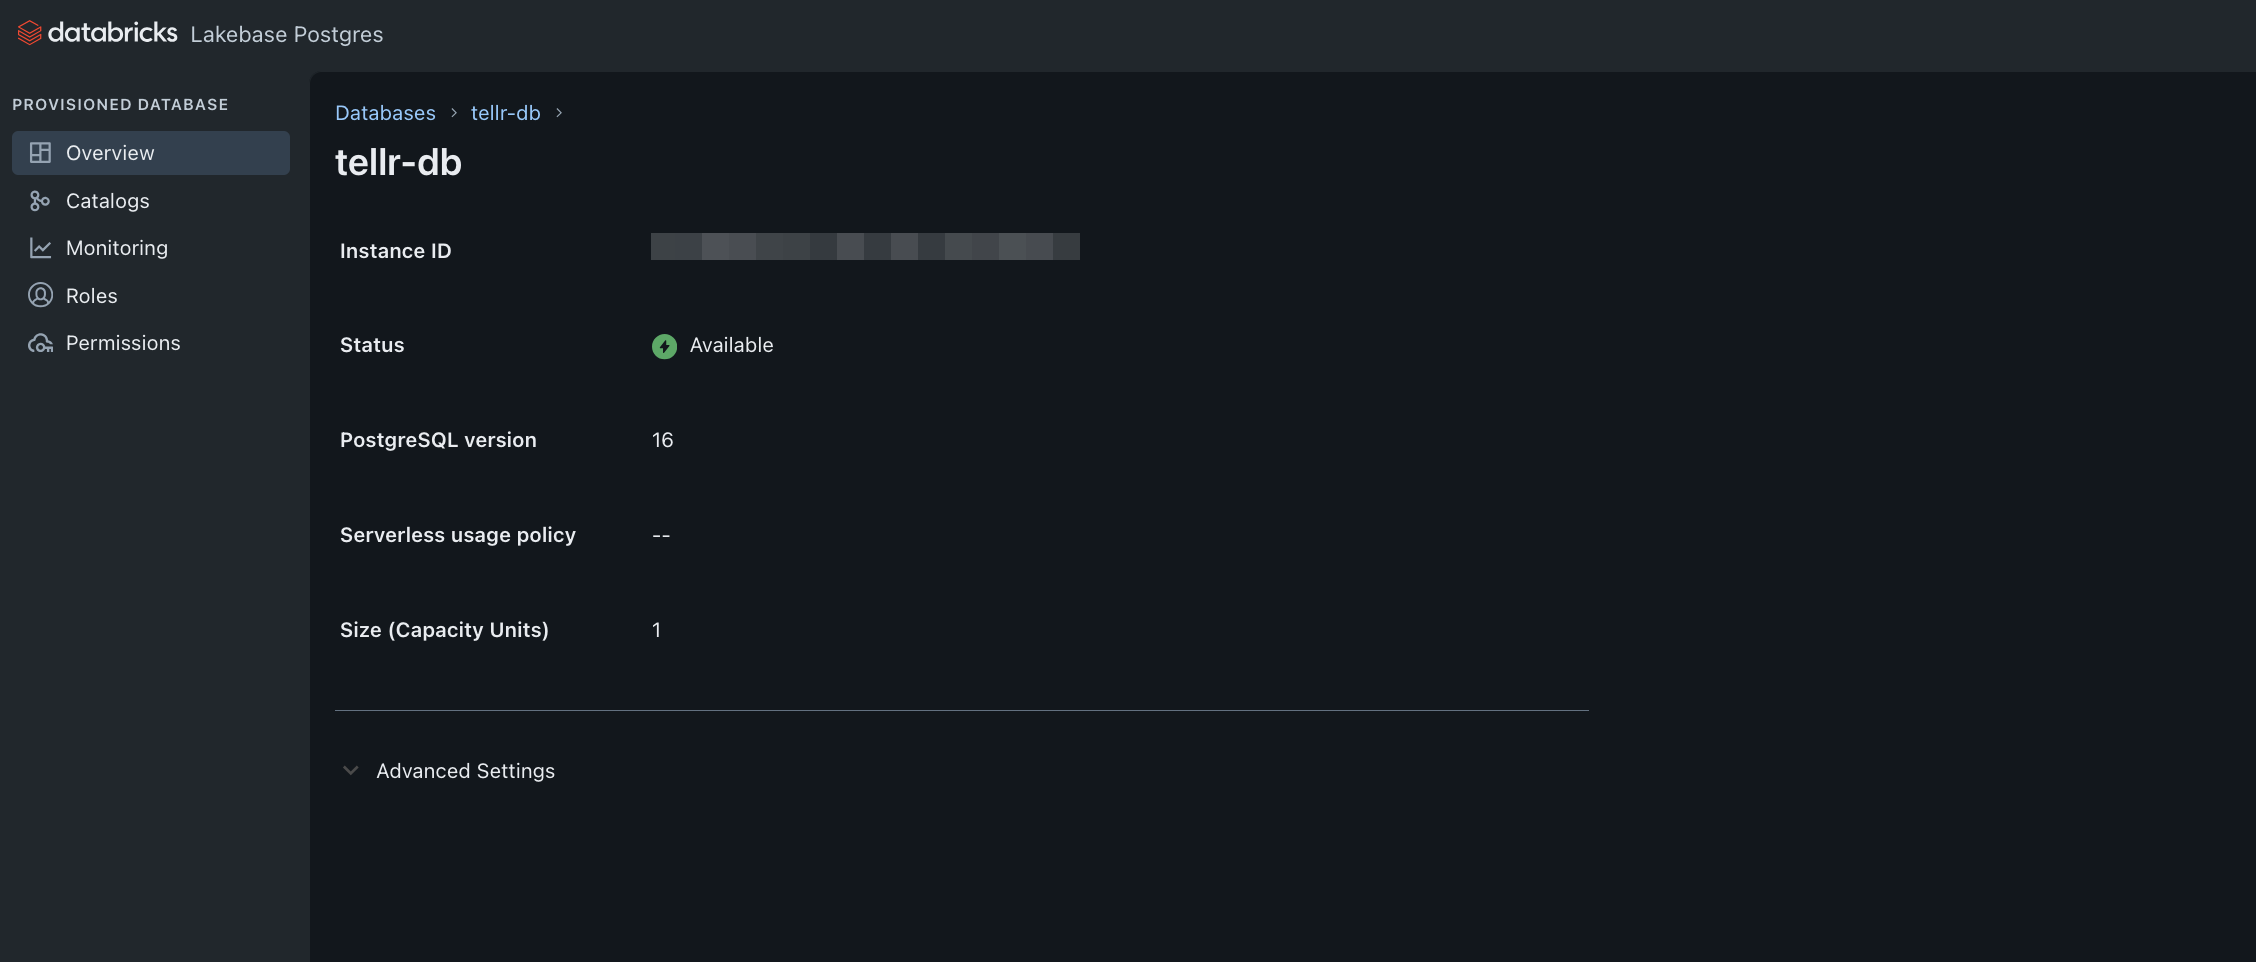
After installation completes, TellR creates a Lakebase (a managed PostgreSQL database) to store its application data. You can verify it was created successfully by navigating to SQL Warehouses in your workspace and checking for the tellr-db instance.
The tellr-db Lakebase is created and available
The Lakebase should show a status of Available with PostgreSQL version 16. This is where TellR stores profiles, slide styles, history, and other app configuration.
Step 3: Authorize the App
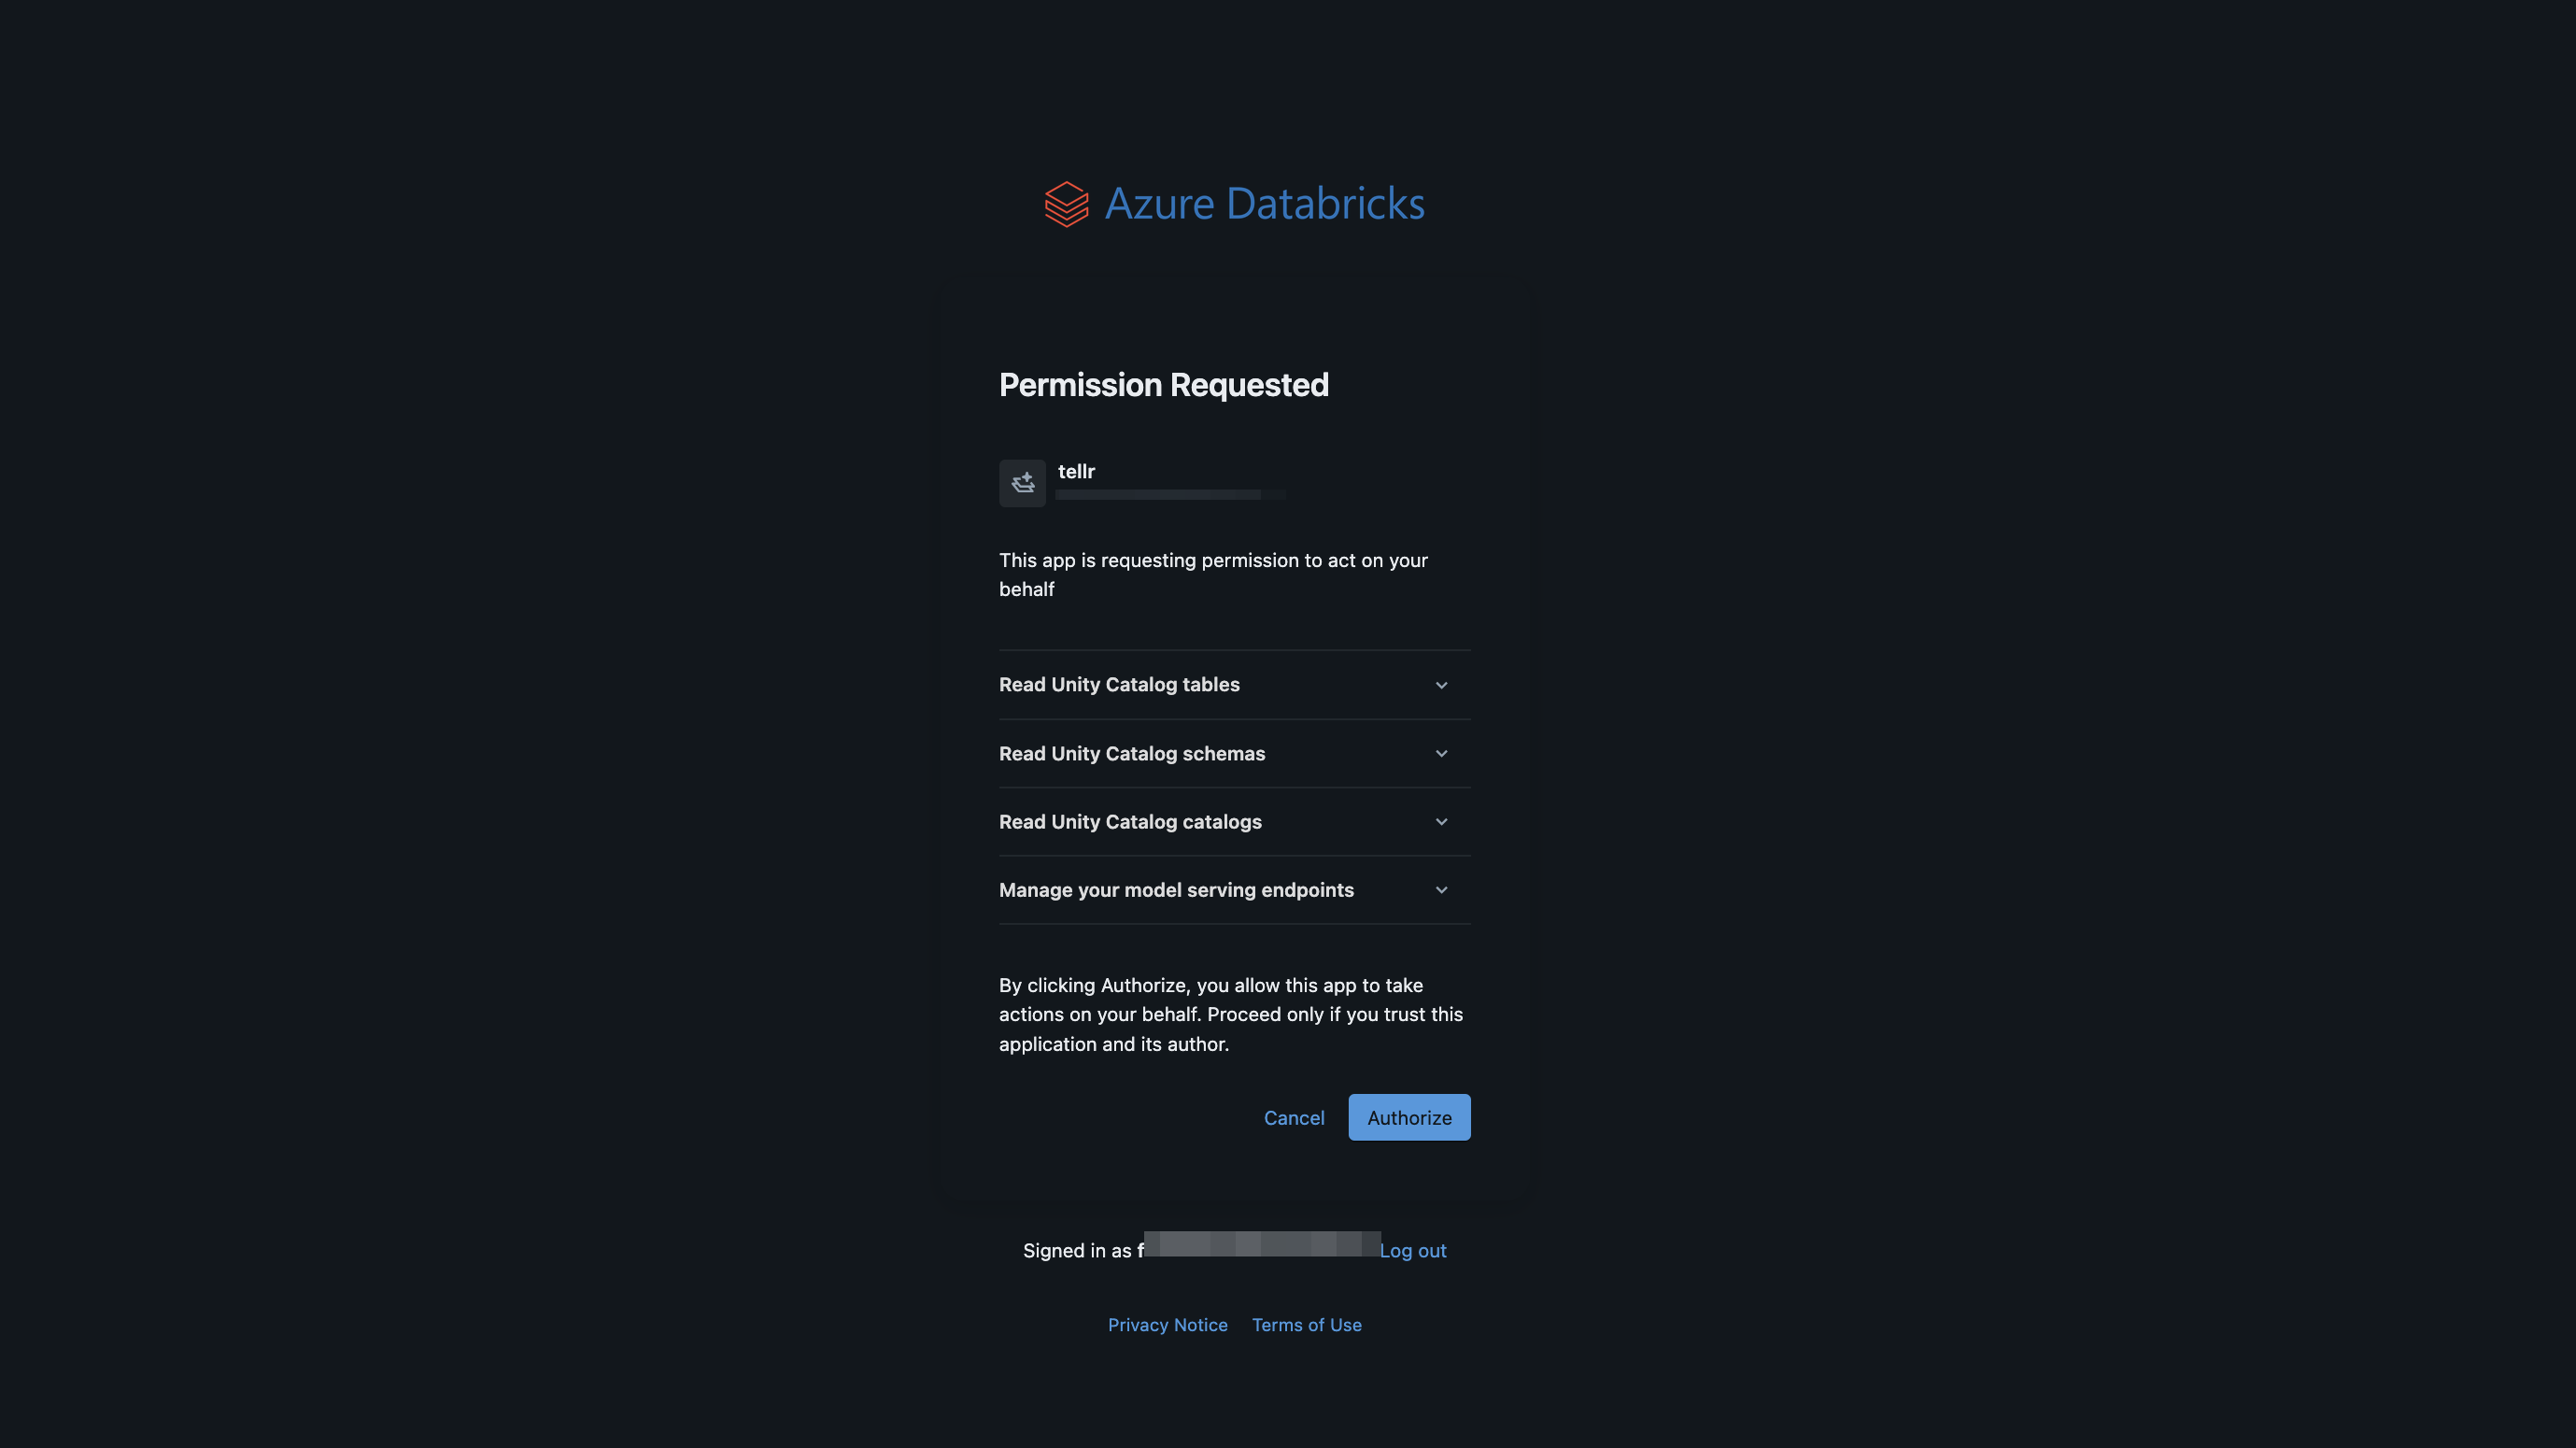
When you first open TellR, you’ll be prompted to authorize the app to act on your behalf. This is the On Behalf Of (OBO) authentication flow — TellR needs permission to read Unity Catalog tables and manage model serving endpoints under your identity.
Permission request when first opening TellR
Review the requested permissions:
Read Unity Catalog tables — so TellR can query your data through Genie spaces
Read Unity Catalog schemas and catalogs — for data discovery
Manage your model serving endpoints — TellR uses a Foundation Model endpoint for slide generation
Click Authorize to proceed.
Step 4: Explore TellR
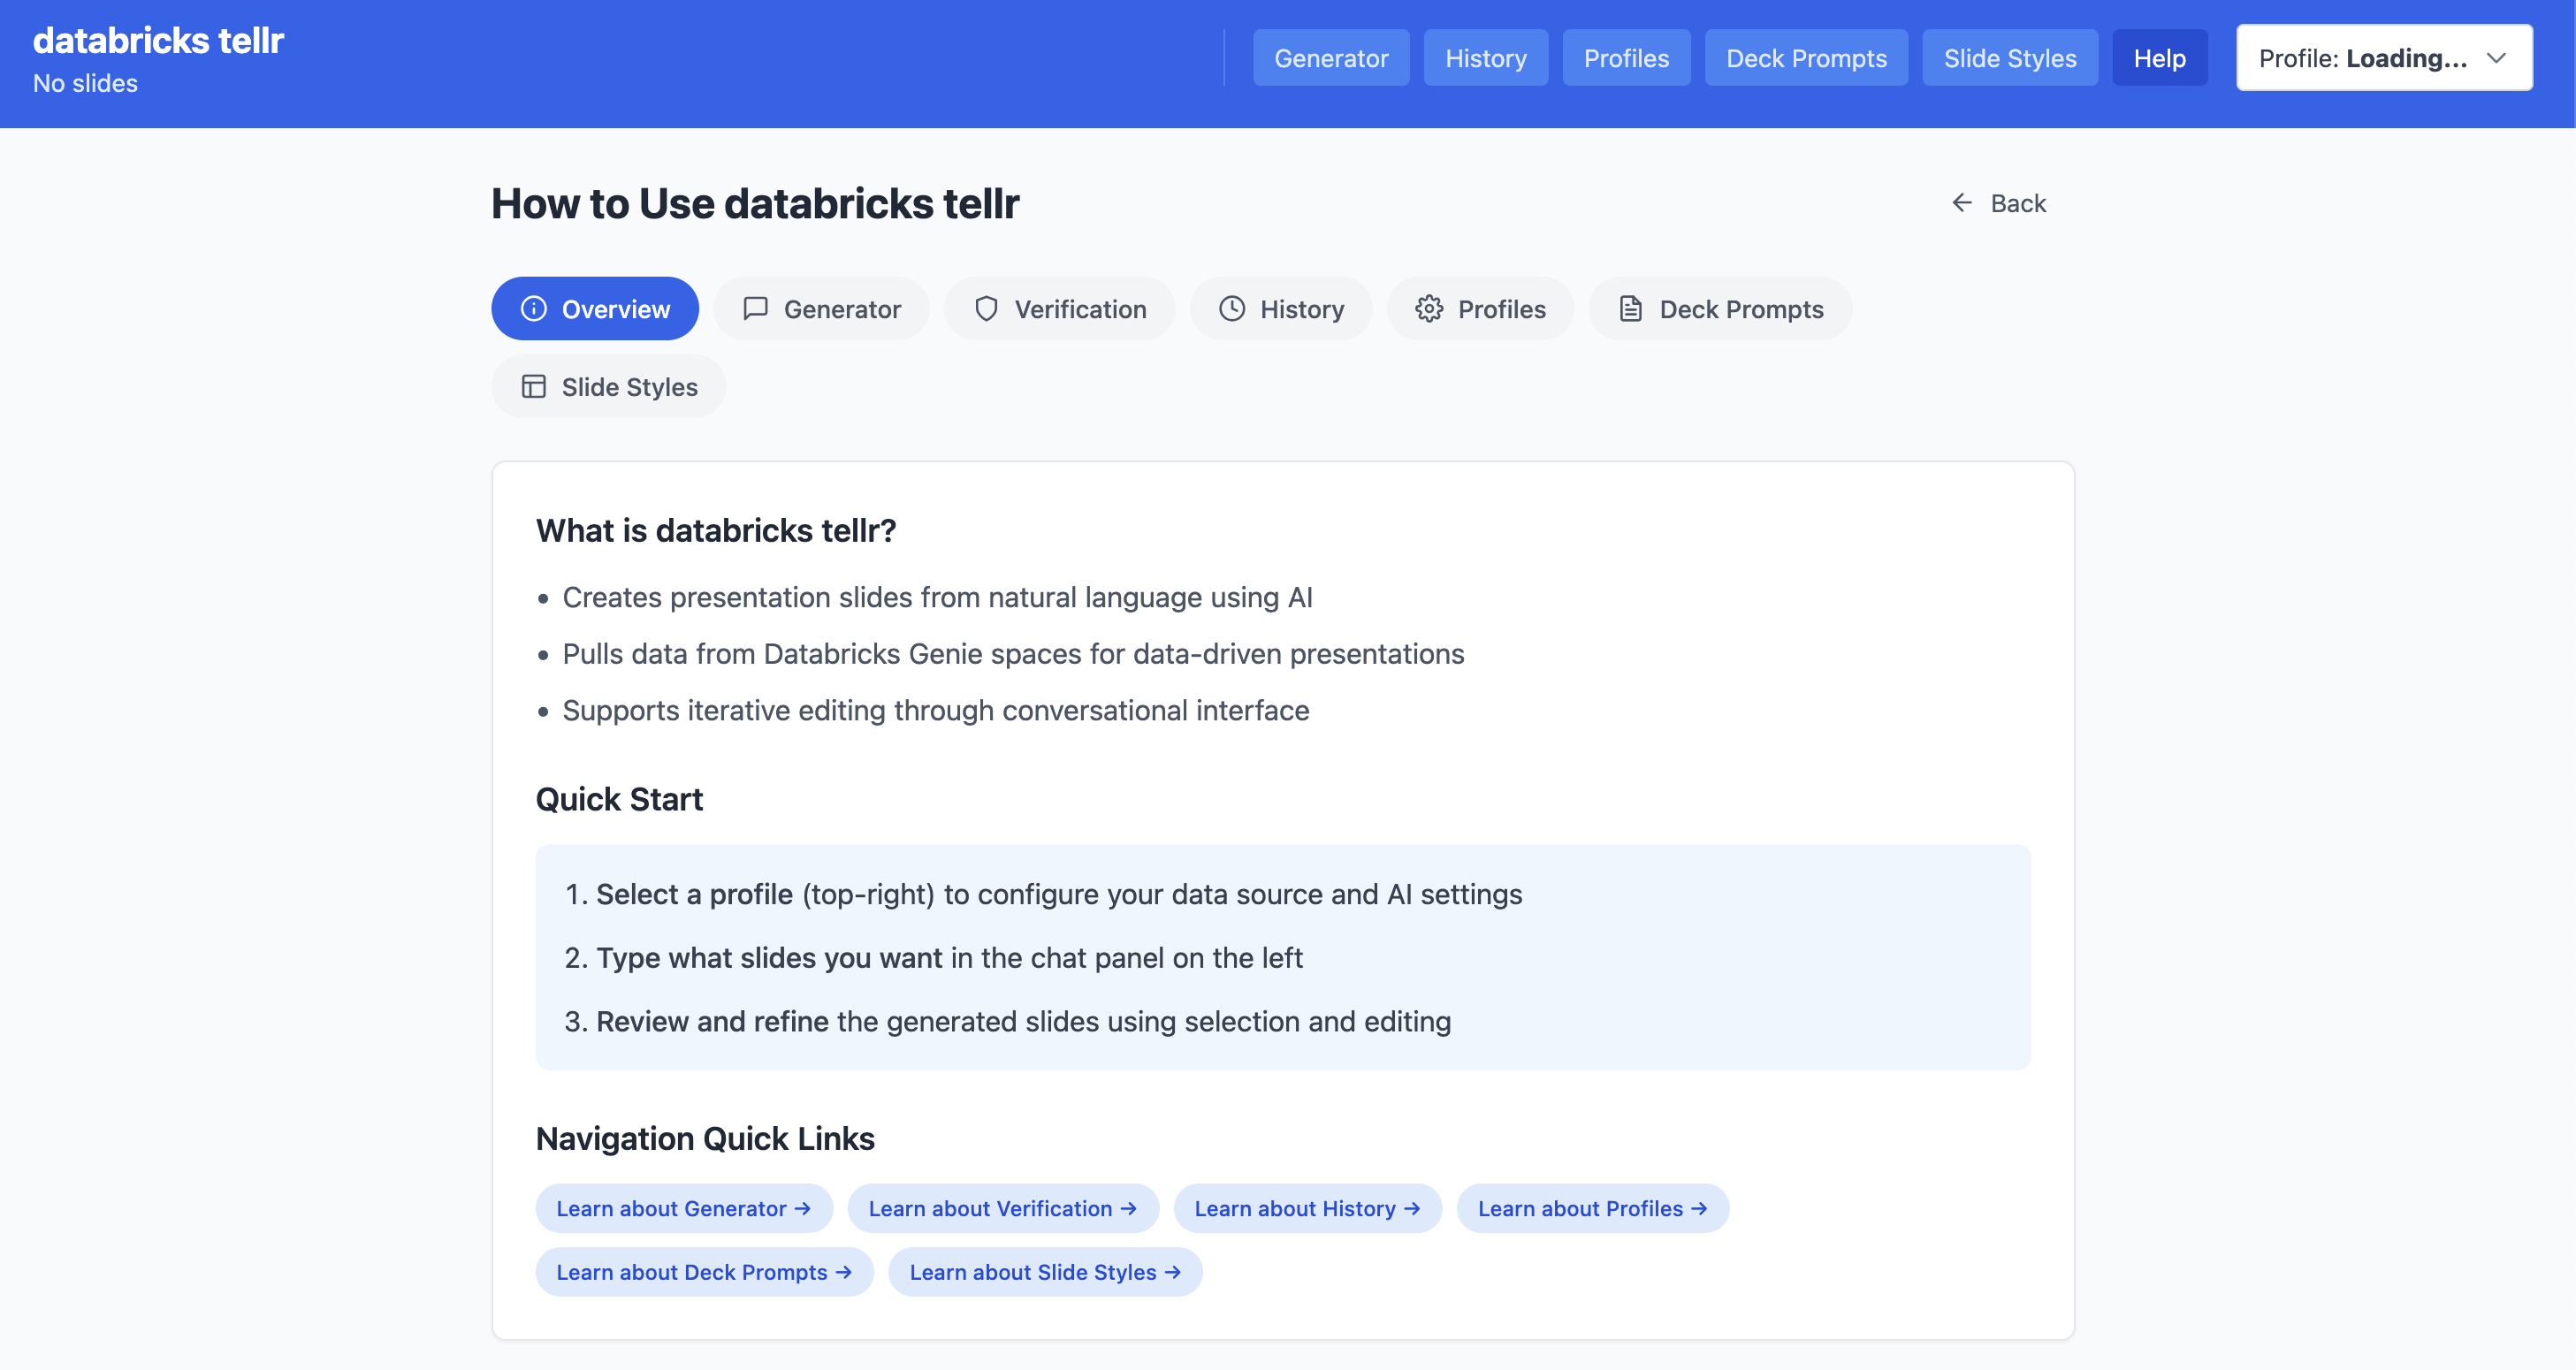
Once authorized, you’ll land on the TellR help page. This gives you an overview of the app’s features and navigation.
TellR landing page
The top navigation bar provides access to:
Generator — The main chat interface for creating slides
History — Previously generated slide decks
Profiles — Configuration profiles that bundle data sources, styles, and prompts
Deck Prompts — Pre-built prompt templates for specific presentation types
Slide Styles — Visual styling rules for slide generation
Help — The overview page you’re looking at
Before we can generate slides, we need to set up three things: a Genie space for our data, a custom slide style, and a profile that ties them together.
Step 5: Create a Genie Space
TellR queries your data through Genie spaces. We need to create one for the Bakehouse dataset.
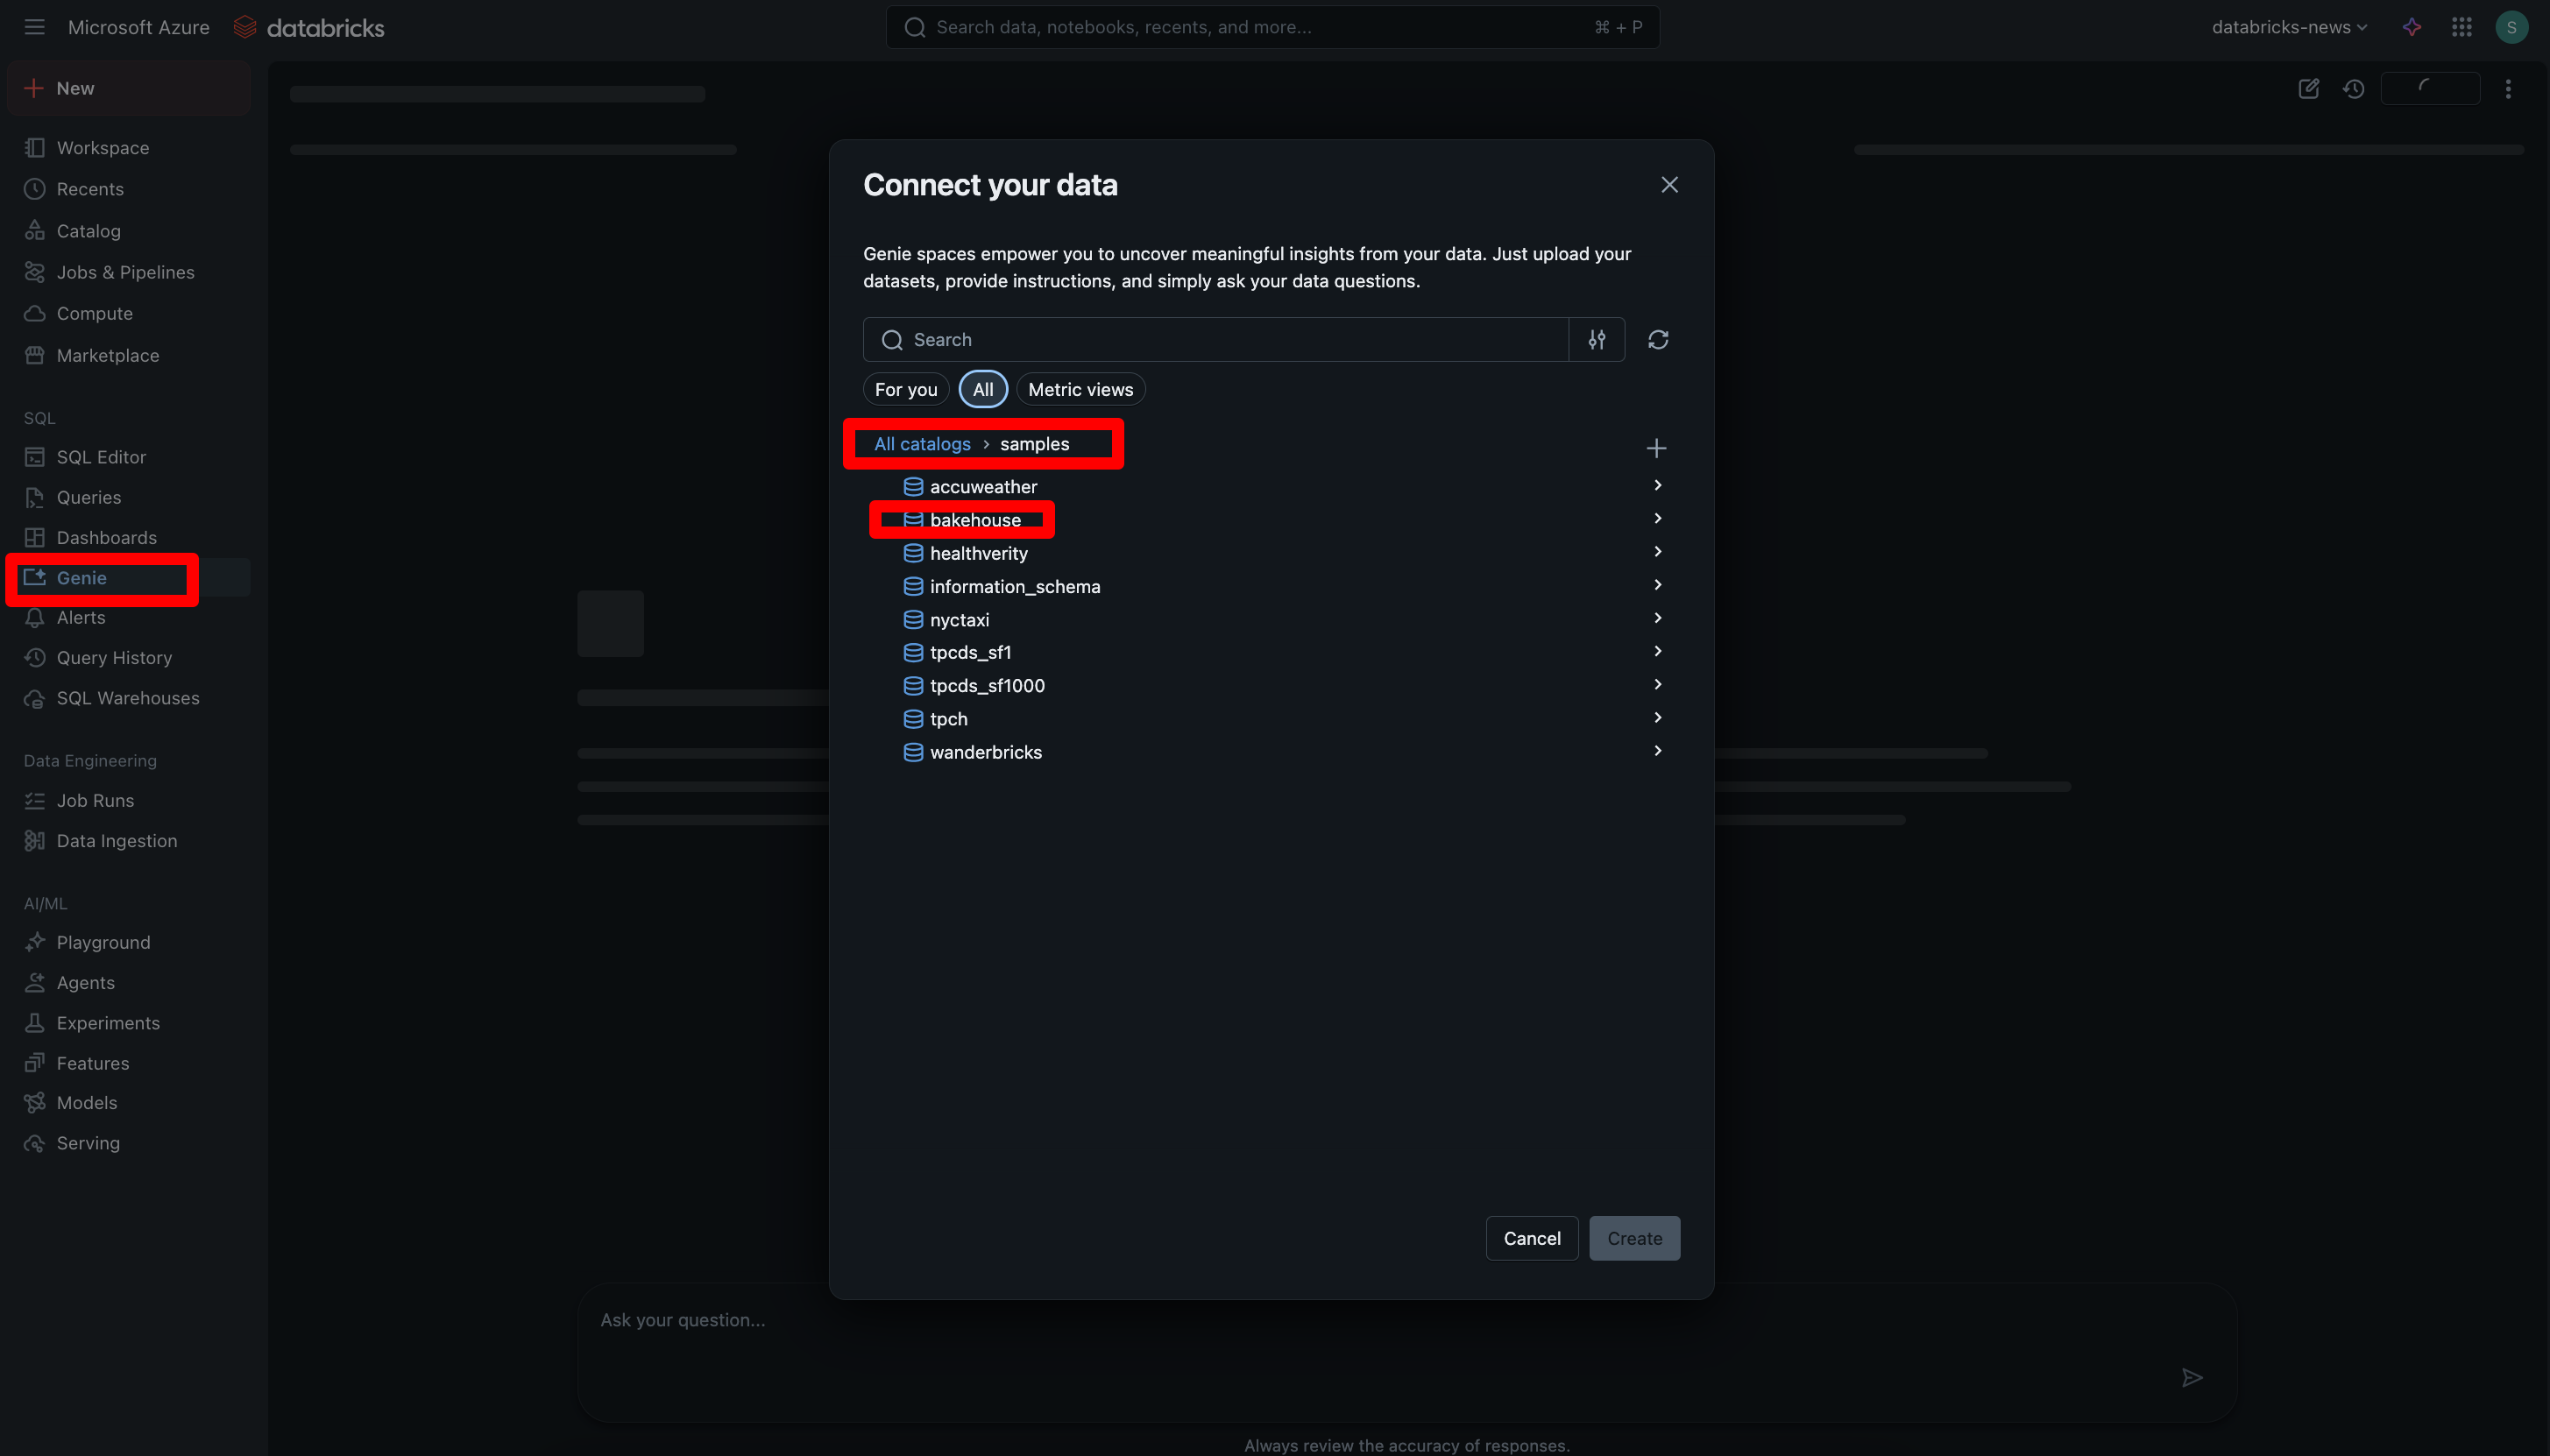
In your Databricks workspace, go to Genie in the left sidebar
Click New Genie space
In the Connect your data dialog, navigate to All catalogs > samples > bakehouse
Navigating to the Bakehouse schema in the Genie space creator
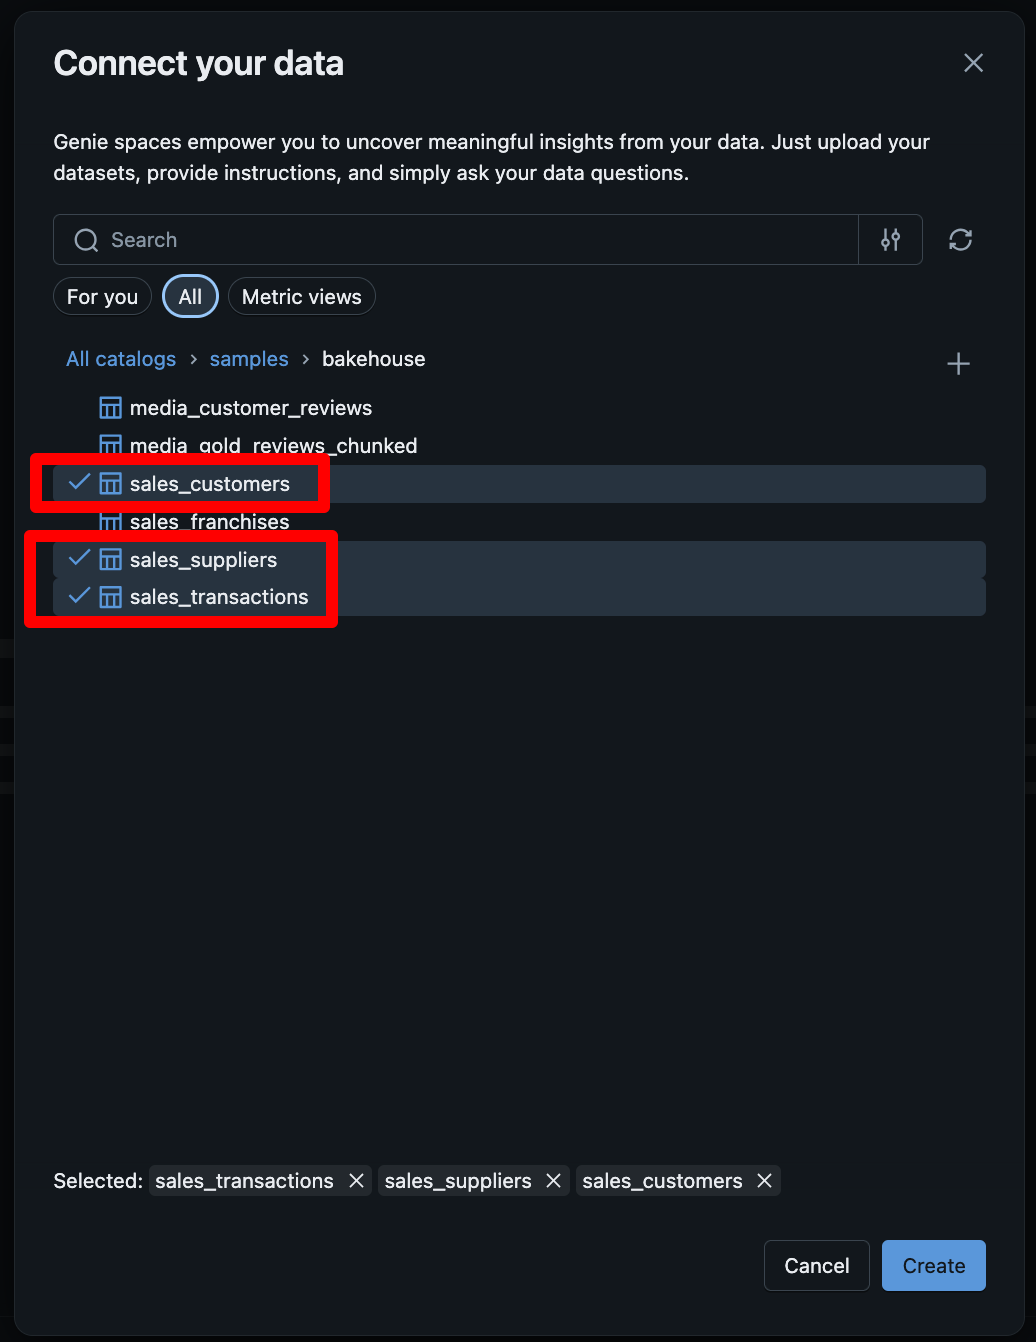
Select the tables you want TellR to query. For this tutorial, select sales_transactions, sales_suppliers, and sales_customers:
Selecting Bakehouse tables for the Genie space
Click Create to save the Genie space
TipGenie Space Tips
The more descriptive your Genie space instructions are, the better TellR will understand your data. You can add a description like: “Sales and customer data for a bakery franchise business. Includes transactions, customer details, and supplier information.”
Step 6: Create a Custom Slide Style
Before creating a profile, let’s set up a custom slide style. TellR comes with a System Default style, but you can create your own to match your branding.
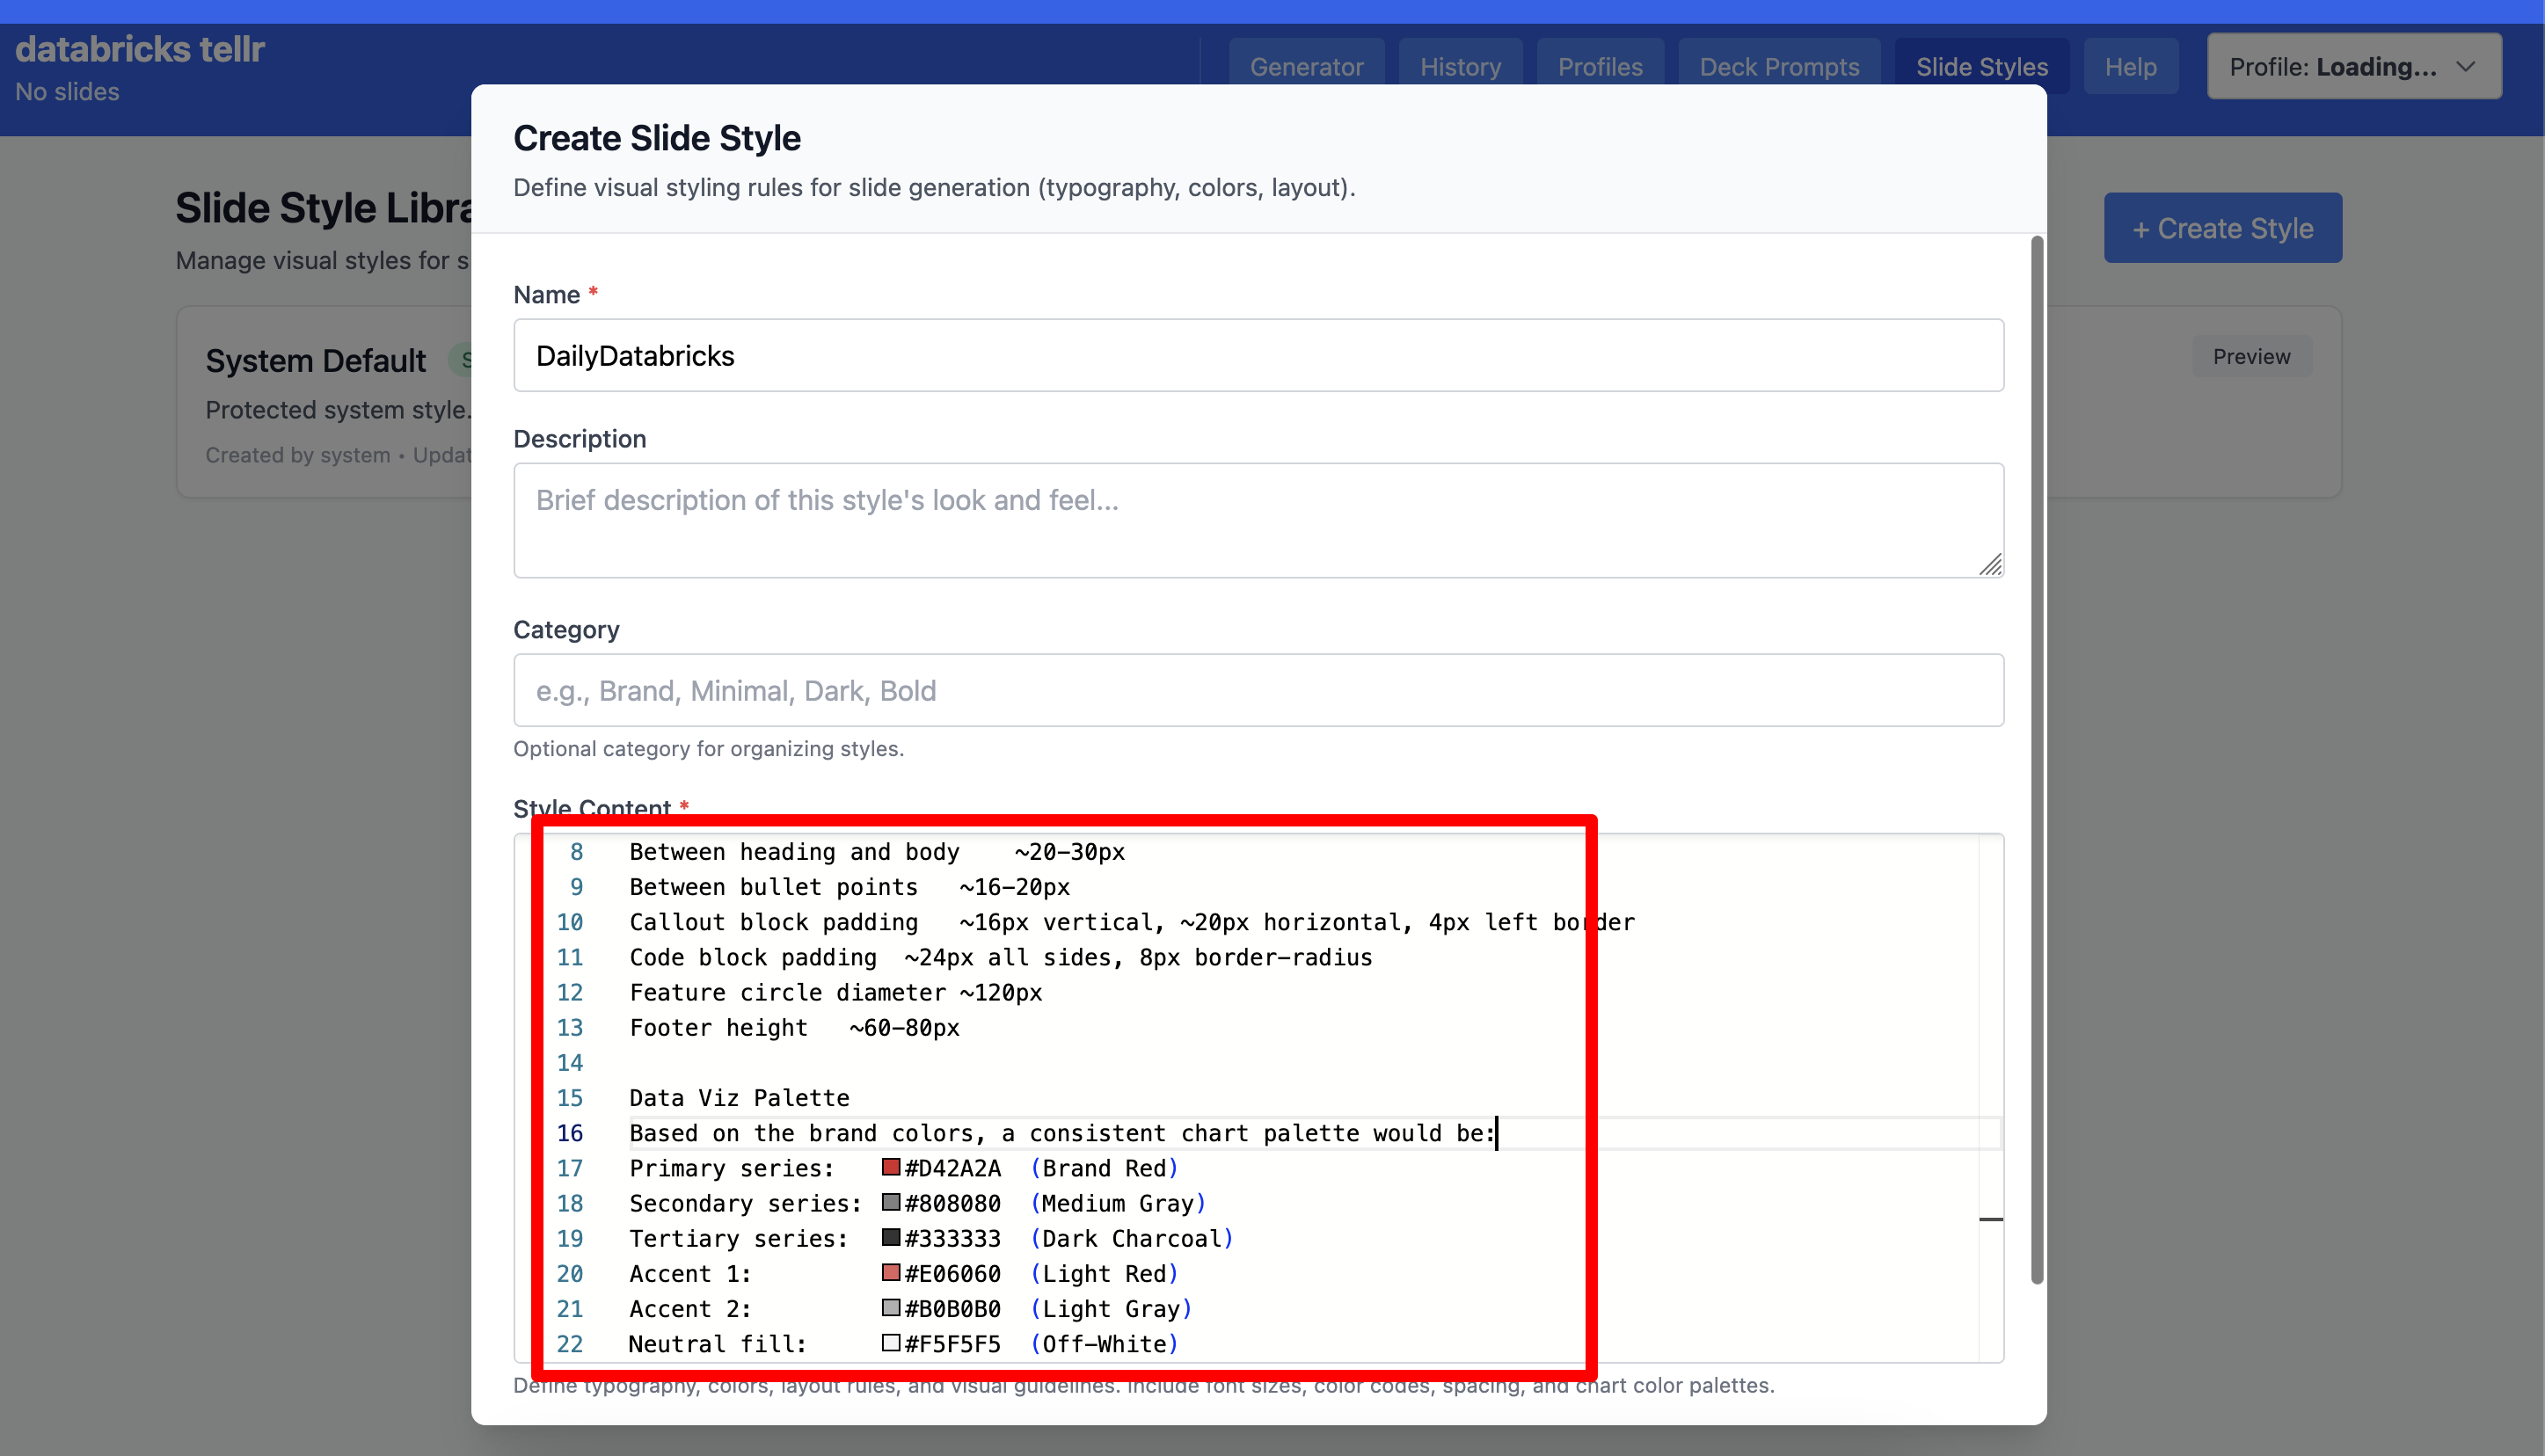
In TellR, click Slide Styles in the top navigation
Click + Create Style
Give it a name — we’ll use DailyDatabricks for this example
Define the style content with your brand colours, typography, spacing, and chart palette
Creating a custom DailyDatabricks slide style
The style content is a text-based specification that controls typography, colours, layout, spacing, and data visualisation palettes. TellR’s AI uses this to generate slides that match your brand identity.
Step 7: Create a Profile
A profile bundles together a Genie space, slide style, and deck prompt into a reusable configuration. The profile creation wizard walks you through five steps.
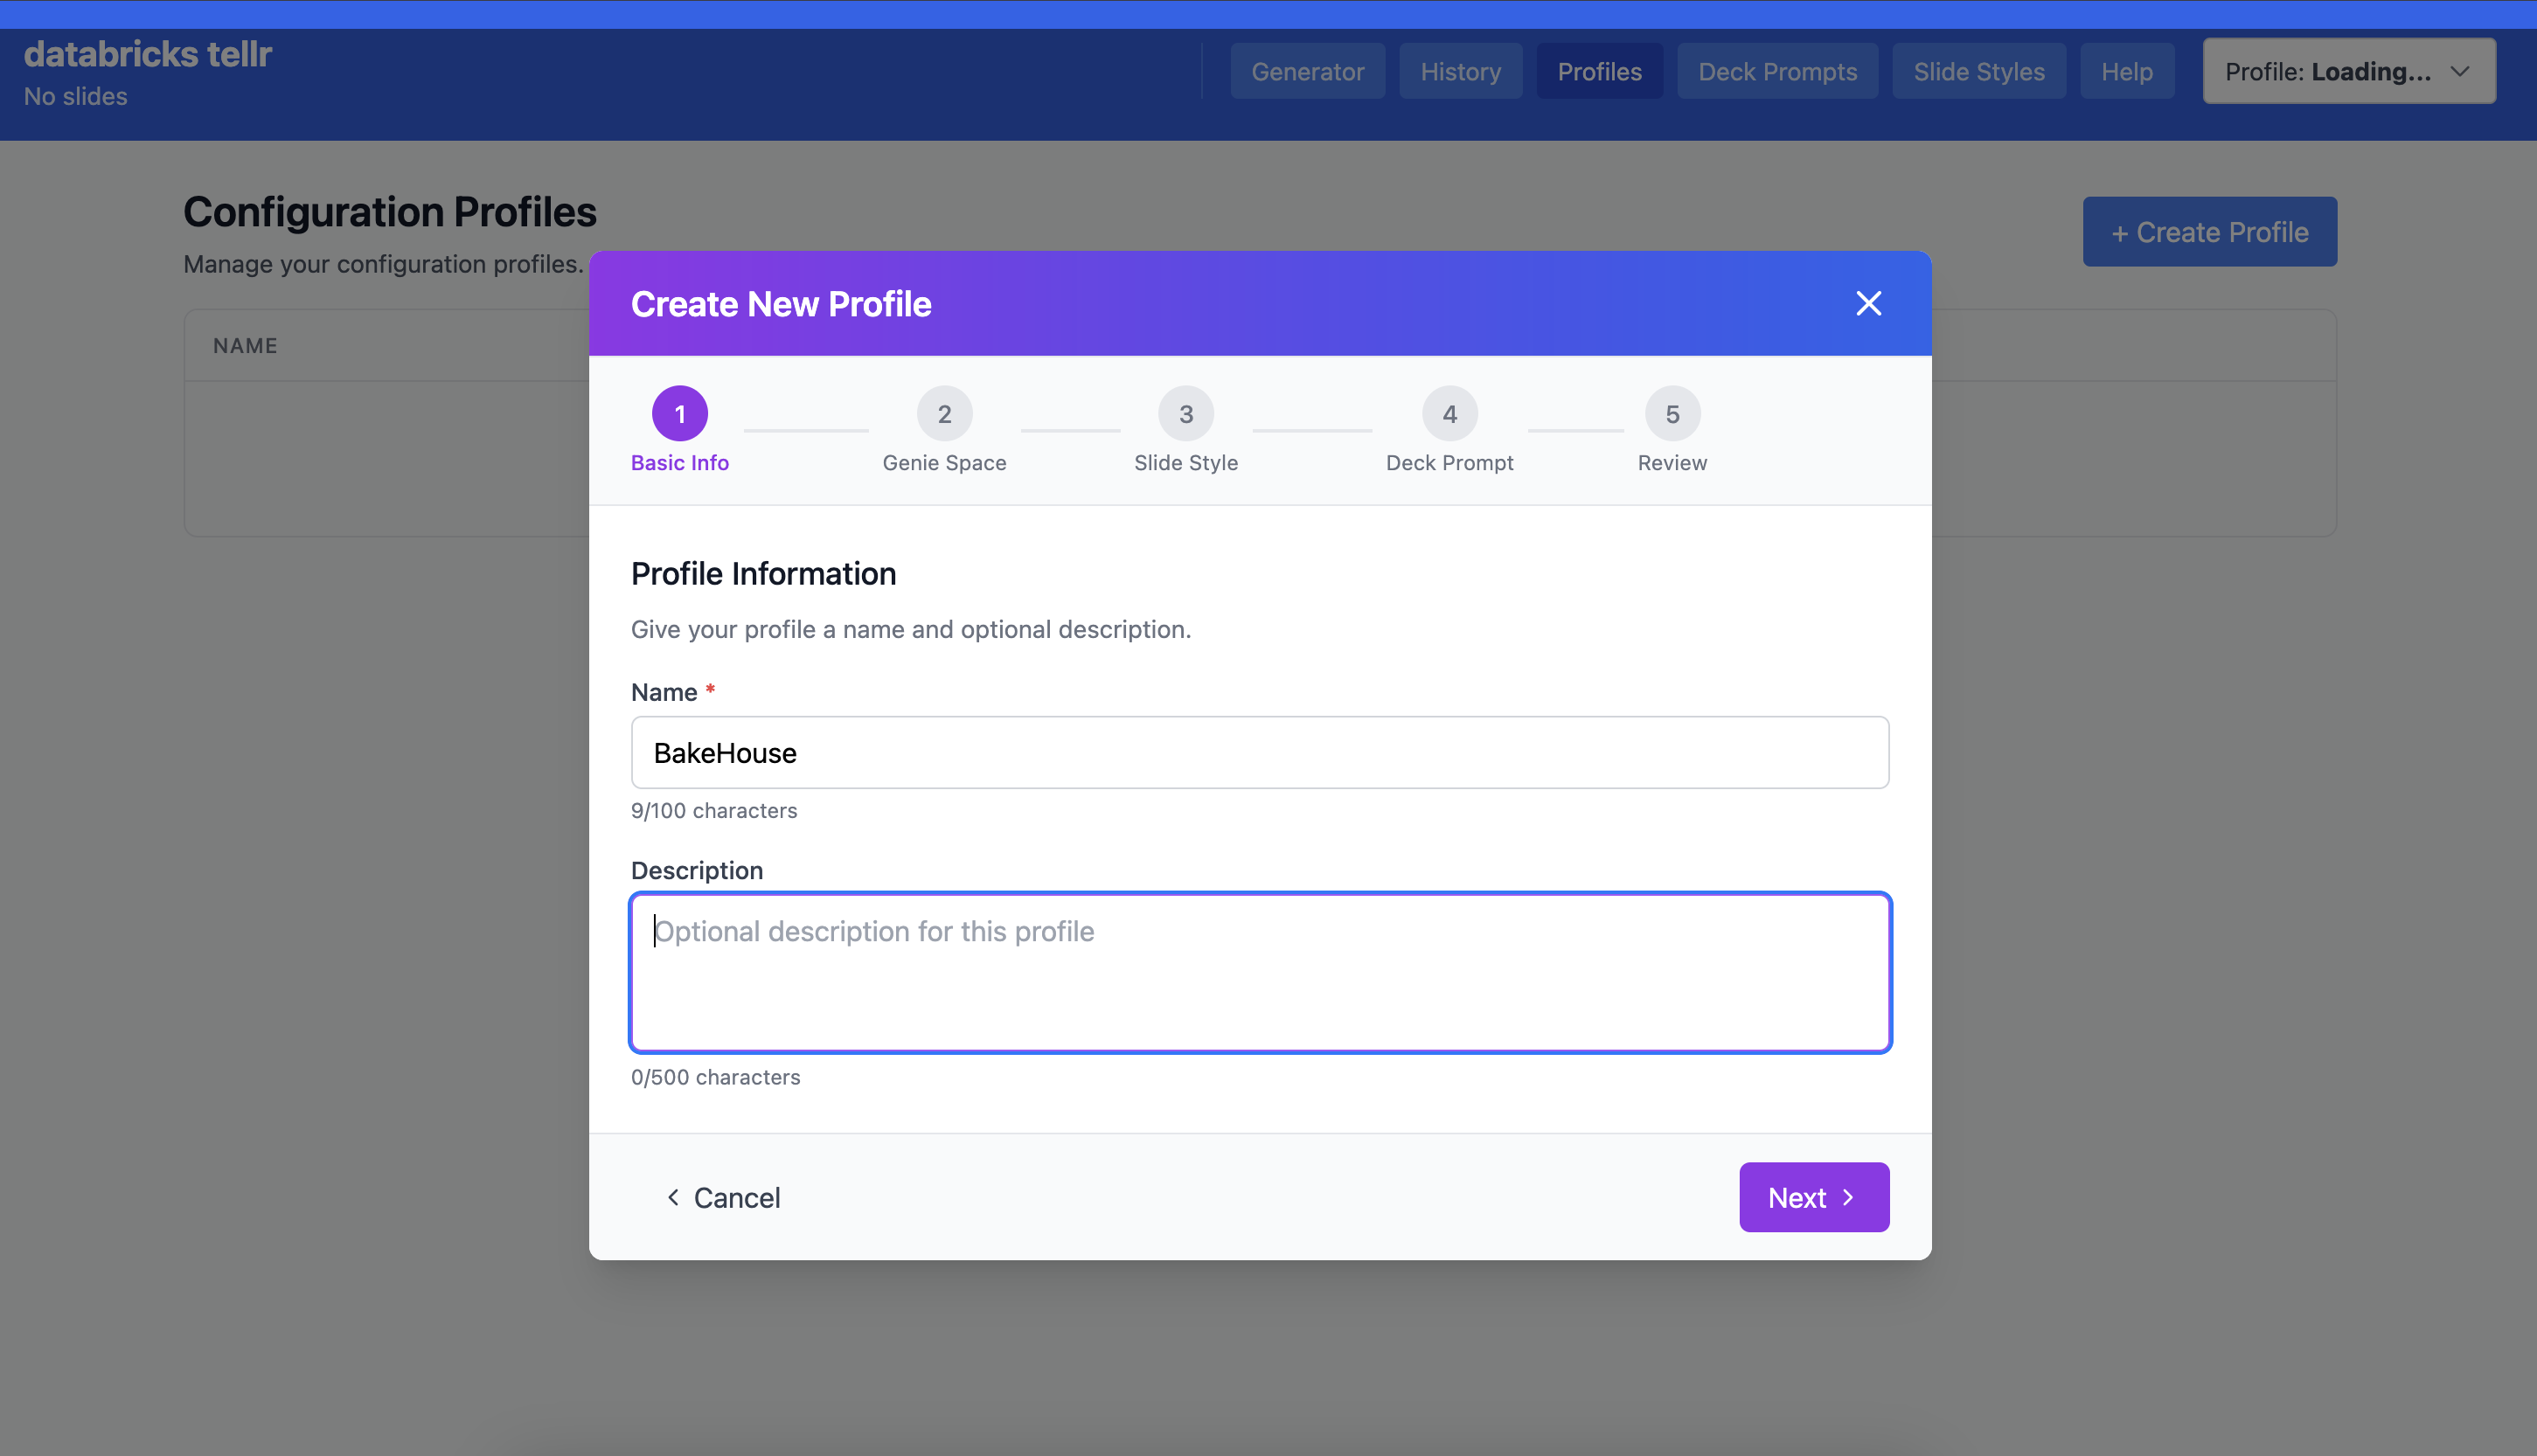
Step 7.1: Basic Info
Click Profiles in the top navigation, then + Create Profile. Give your profile a name — we’ll call ours BakeHouse.
Step 1: Enter profile name and description
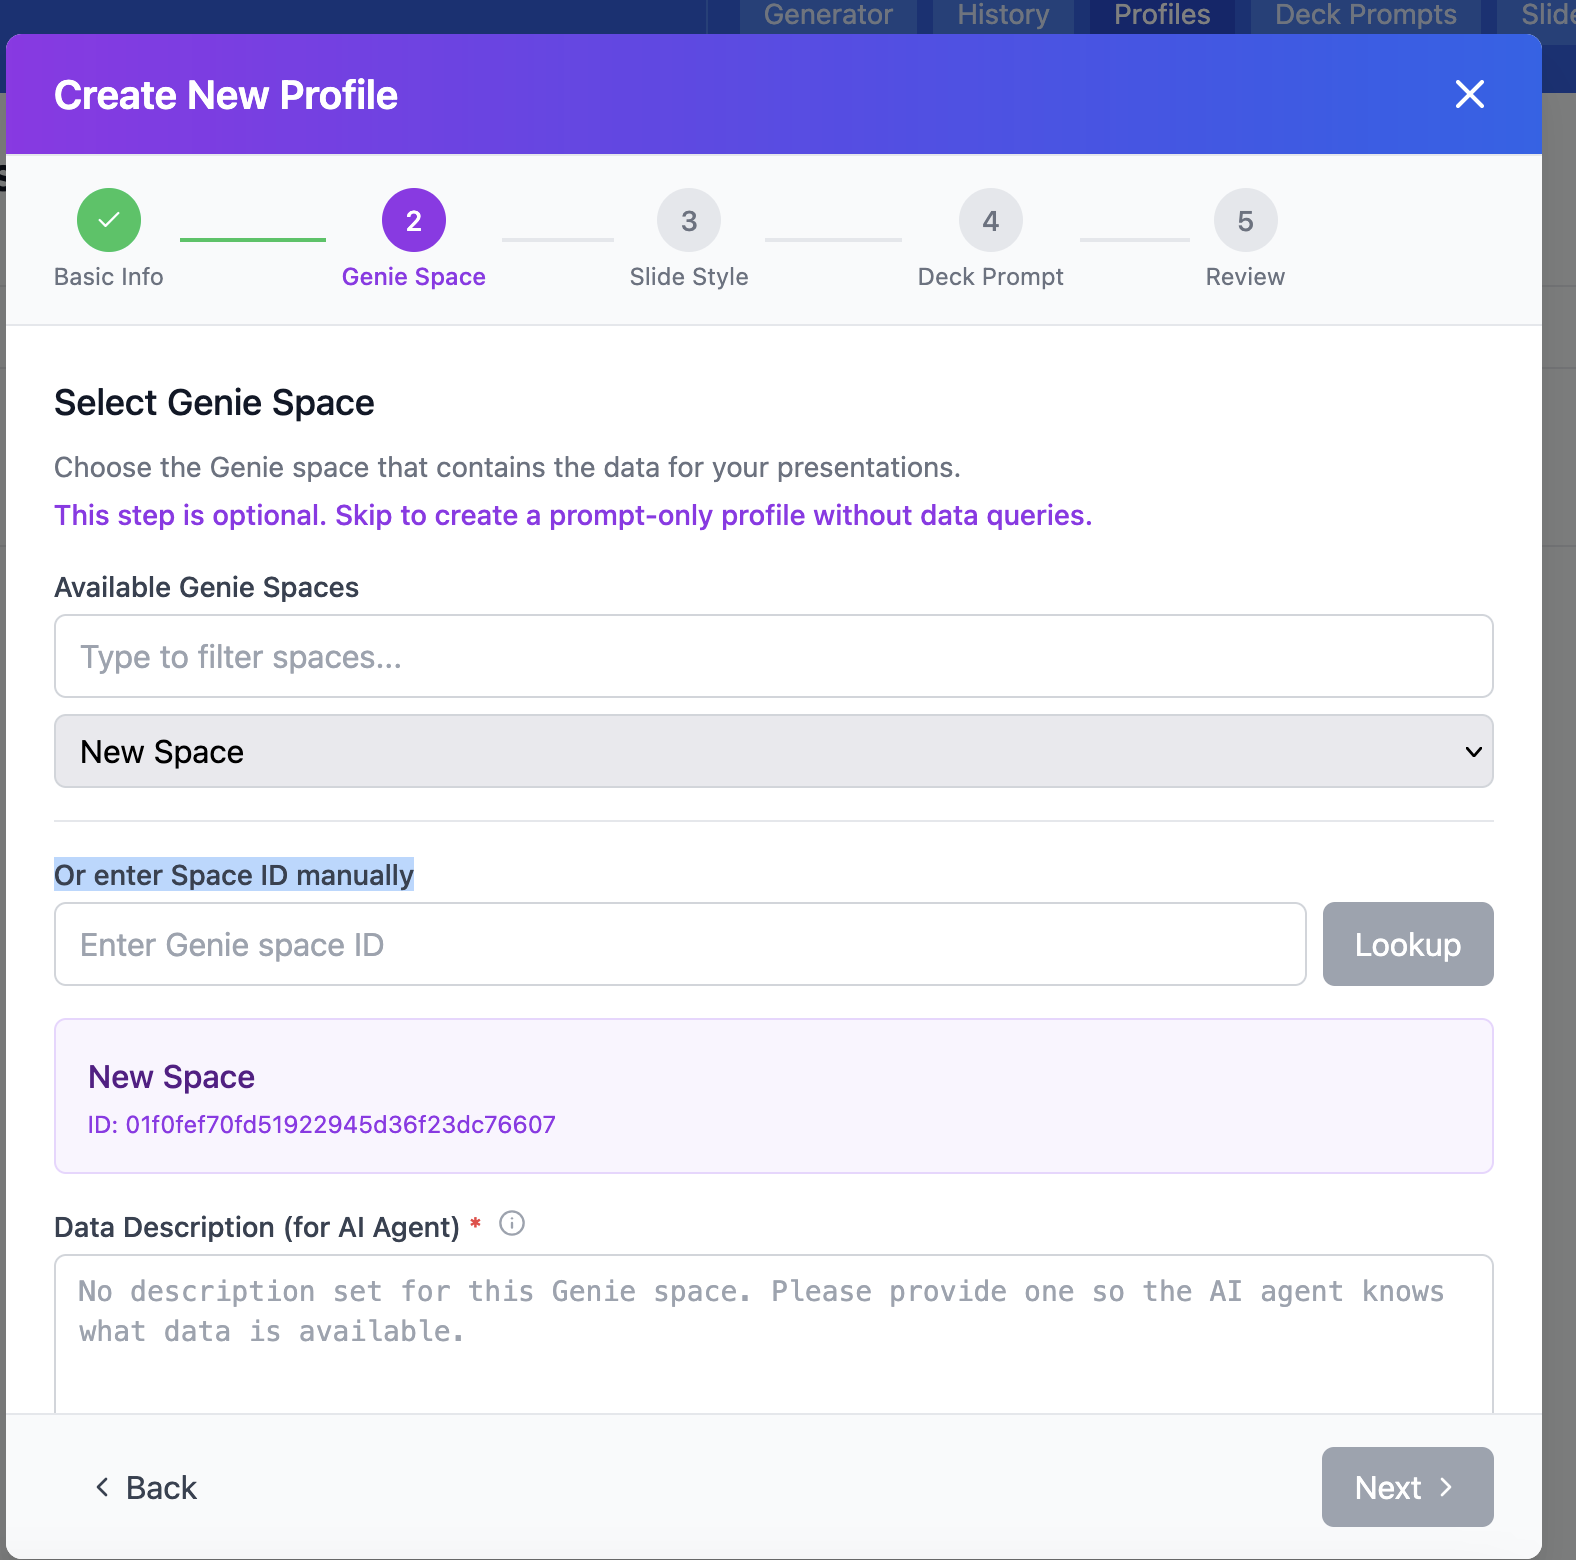
Step 7.2: Select Genie Space
Choose the Genie space you created in Step 5. This tells TellR where to pull data from when generating slides.
Step 2: Select the Genie space for your profile
TipData Description
Fill in the Data Description (for AI Agent) field to give TellR’s AI context about what your data represents. This helps it generate more relevant slide narratives.
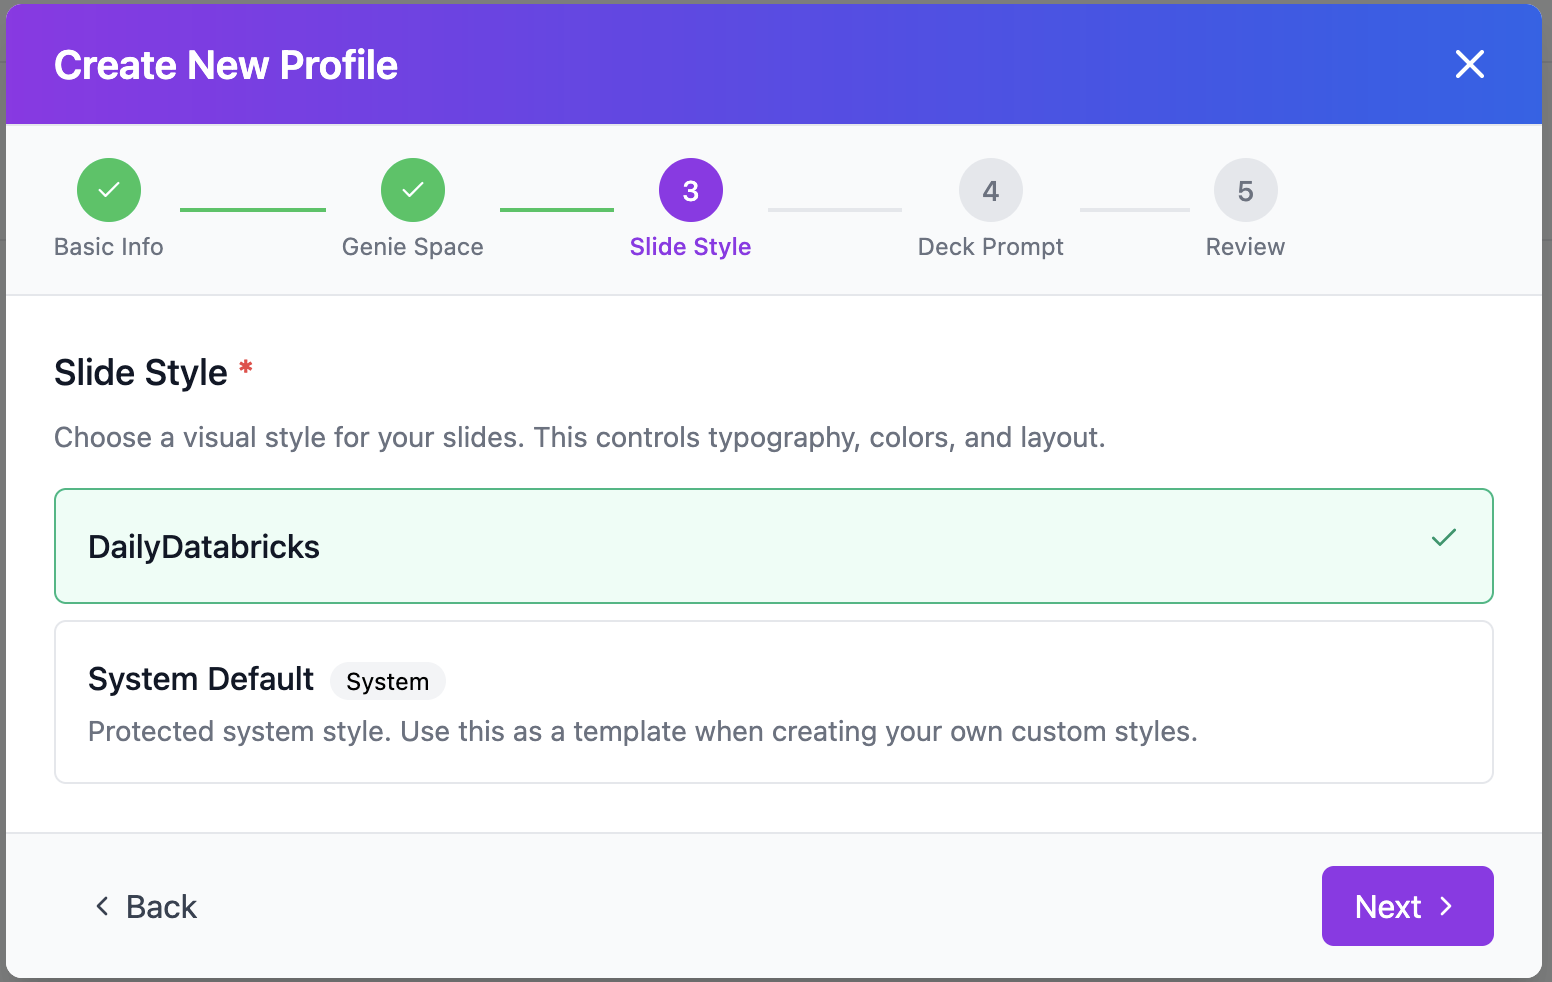
Step 7.3: Select Slide Style
Choose the DailyDatabricks style we created in Step 6. This controls the visual appearance of generated slides.
Step 3: Select the DailyDatabricks slide style
Step 7.4: Select Deck Prompt
Choose a deck prompt template that matches the type of presentation you want to create. For this example, we’ll select Quarterly Business Review which structures the deck around performance metrics, achievements, challenges, and strategic recommendations.
Step 4: Select a deck prompt template
Step 7.5: Review and Save
Review your profile settings and save. You can always come back to edit these later.
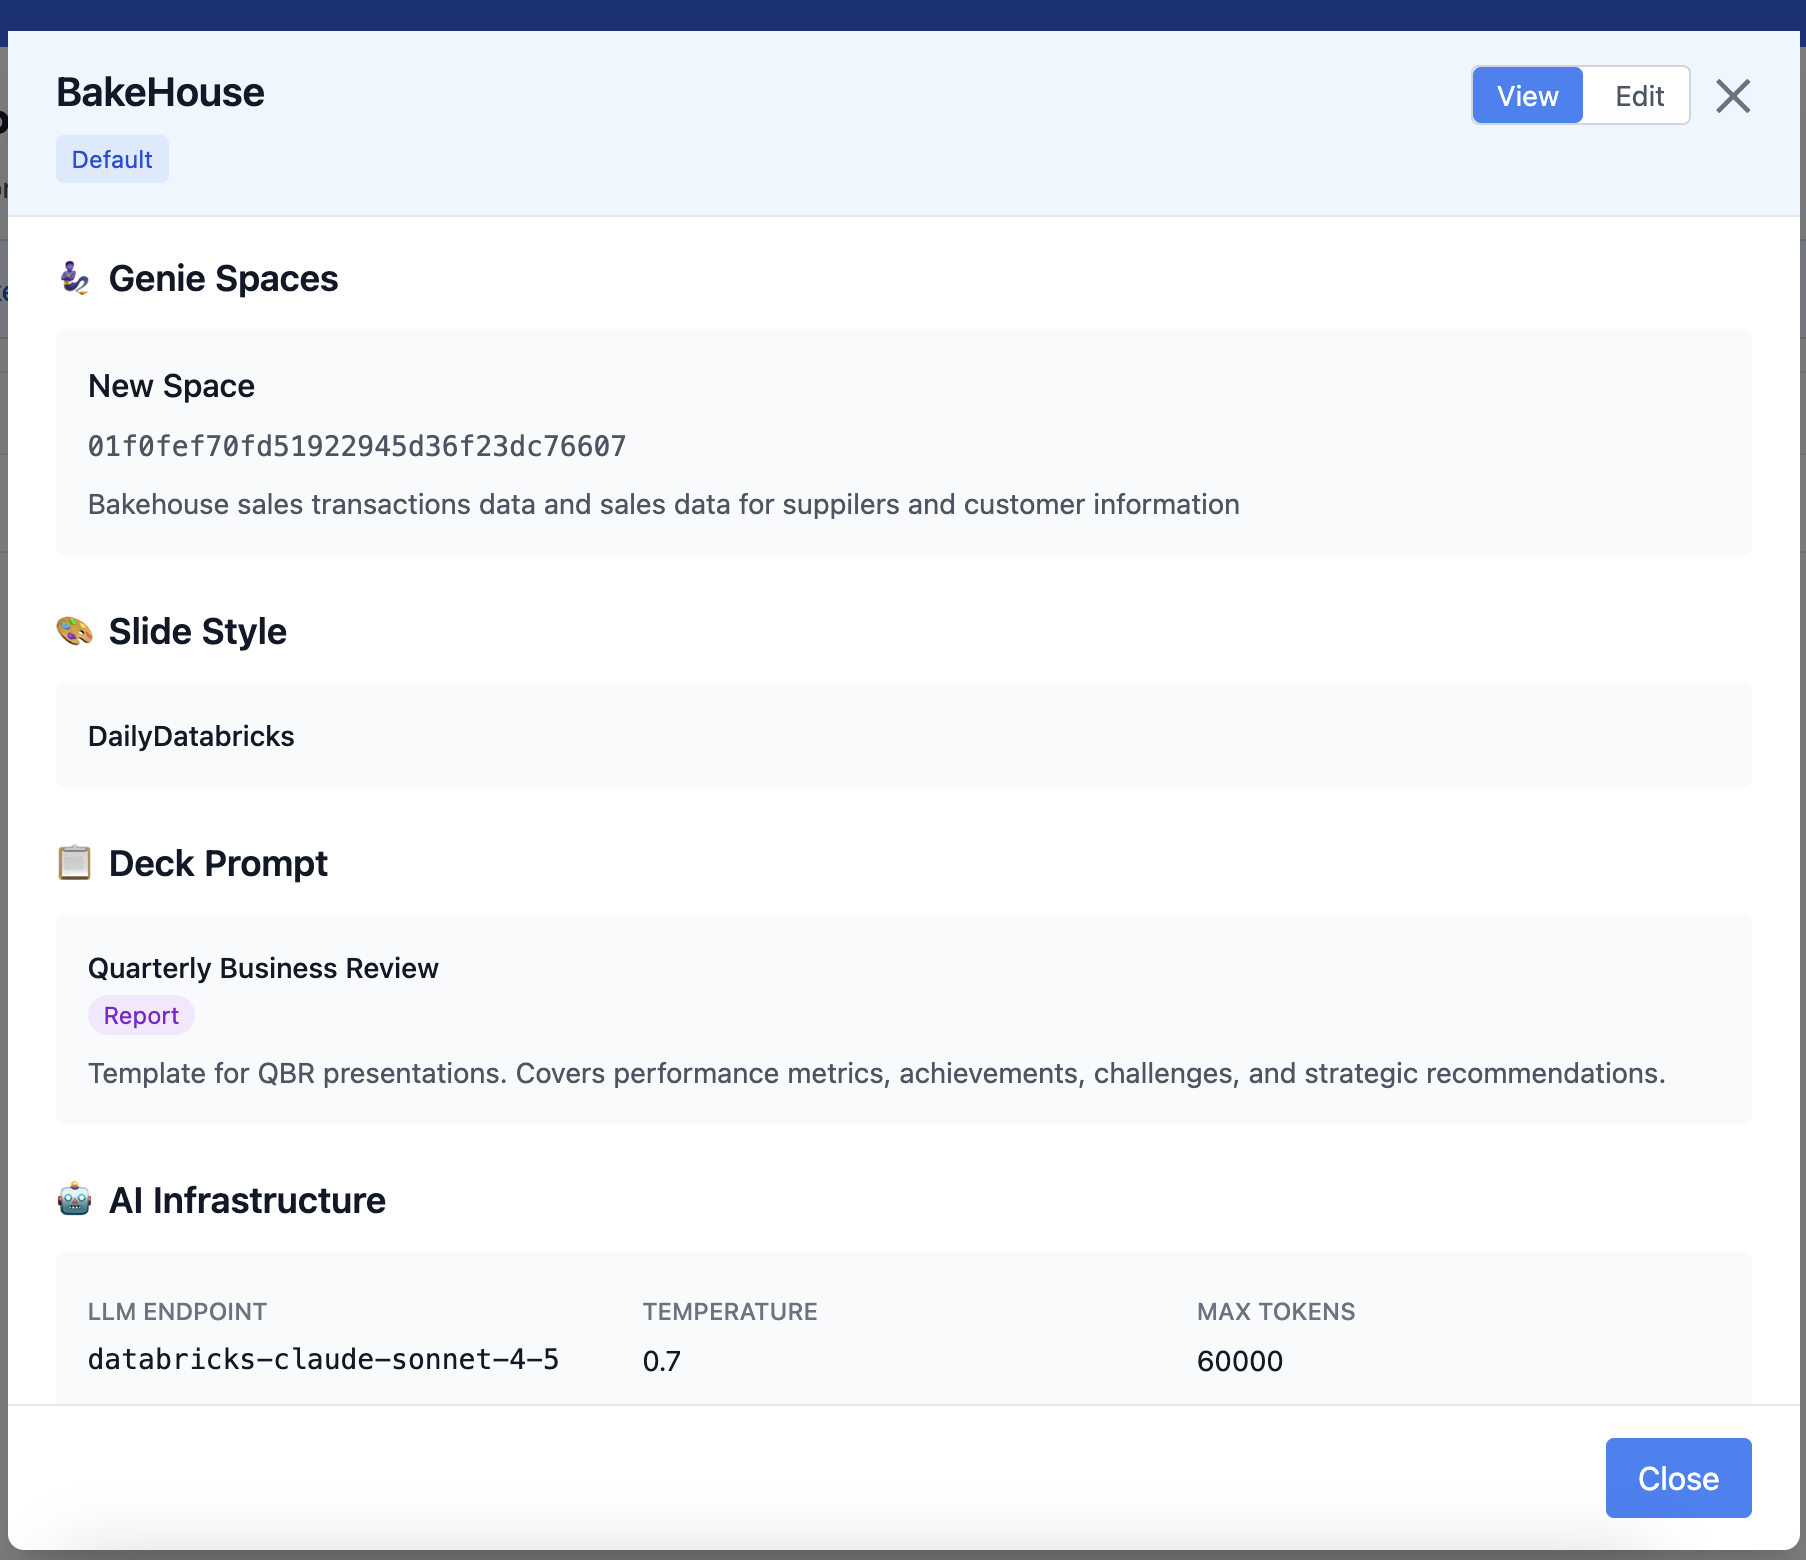
Step 8: Review Your Profile
After creation, you can view your profile details at any time by clicking on it in the Profiles tab. This shows the complete configuration at a glance.
Viewing the BakeHouse profile configuration
Notice the profile shows:
Genie Space — linked to the Bakehouse data
Slide Style — DailyDatabricks
Deck Prompt — Quarterly Business Review
AI Infrastructure — the Foundation Model endpoint being used (in this case, databricks-claude-sonnet-4-5 with temperature 0.7)
TipEditing a Profile
Click the Edit button at the top of the profile view to modify any setting. You can change the Genie space, swap styles, or switch deck prompts without creating a new profile.
Step 9: Generate Your Slides
Now for the main event. Make sure your BakeHouse profile is selected in the top-right dropdown, then navigate to the Generator tab.
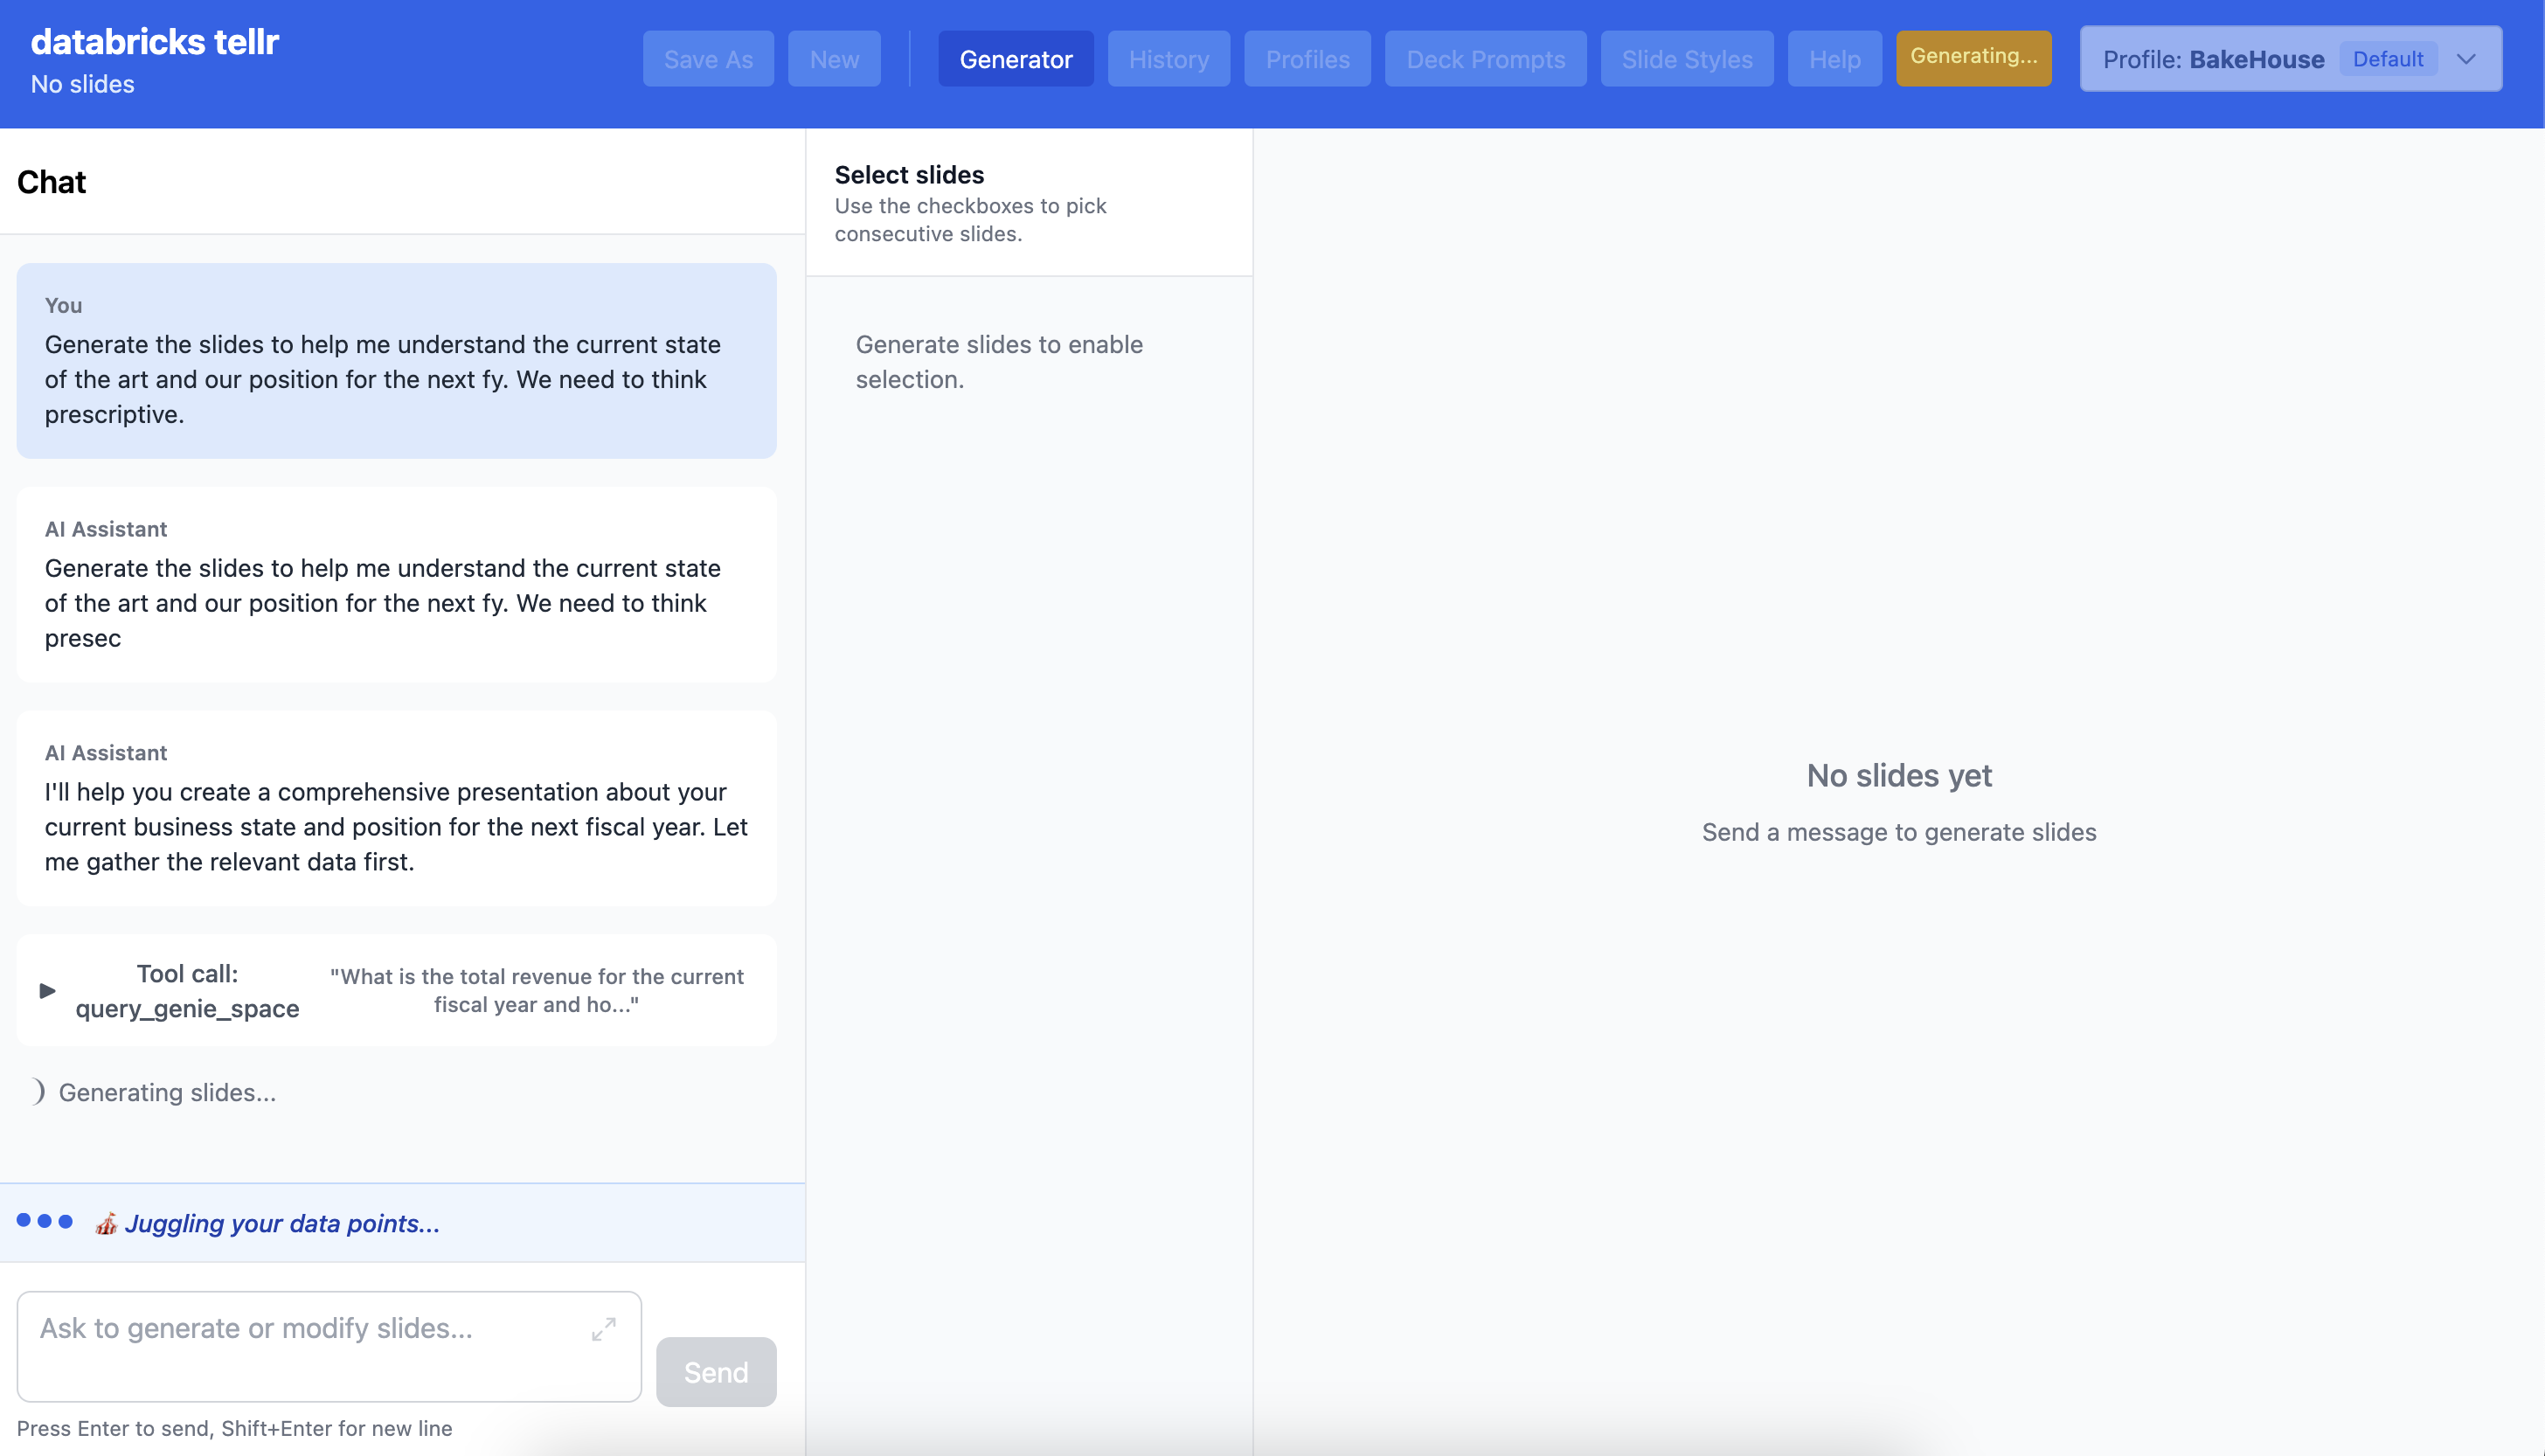
Type a prompt describing the presentation you want. For example:
Generate the slides to help me understand the current state of the art and our position for the next FY. We need to think prescriptive.
TellR will begin querying your Genie space and generating slides. You can watch the process in the chat panel — it makes multiple calls to query_genie_space to gather the data it needs.
TellR generating slides from Bakehouse data via Genie queries
After a few moments, the slides appear in the preview panel on the right. You can select individual slides, review the generated content, and continue the conversation to refine them.
The generated FY2025 Strategic Position Review presentation
The generated deck includes:
A title slide with your branding
Executive summary with key metrics
Data visualisations pulled directly from Bakehouse
Strategic analysis and recommendations
TipIterative Refinement
You don’t need to get your prompt perfect the first time. TellR supports conversational editing — ask it to change colours, swap chart types, add comparisons, or restructure the narrative. Think of it like chatting with a presentation designer.
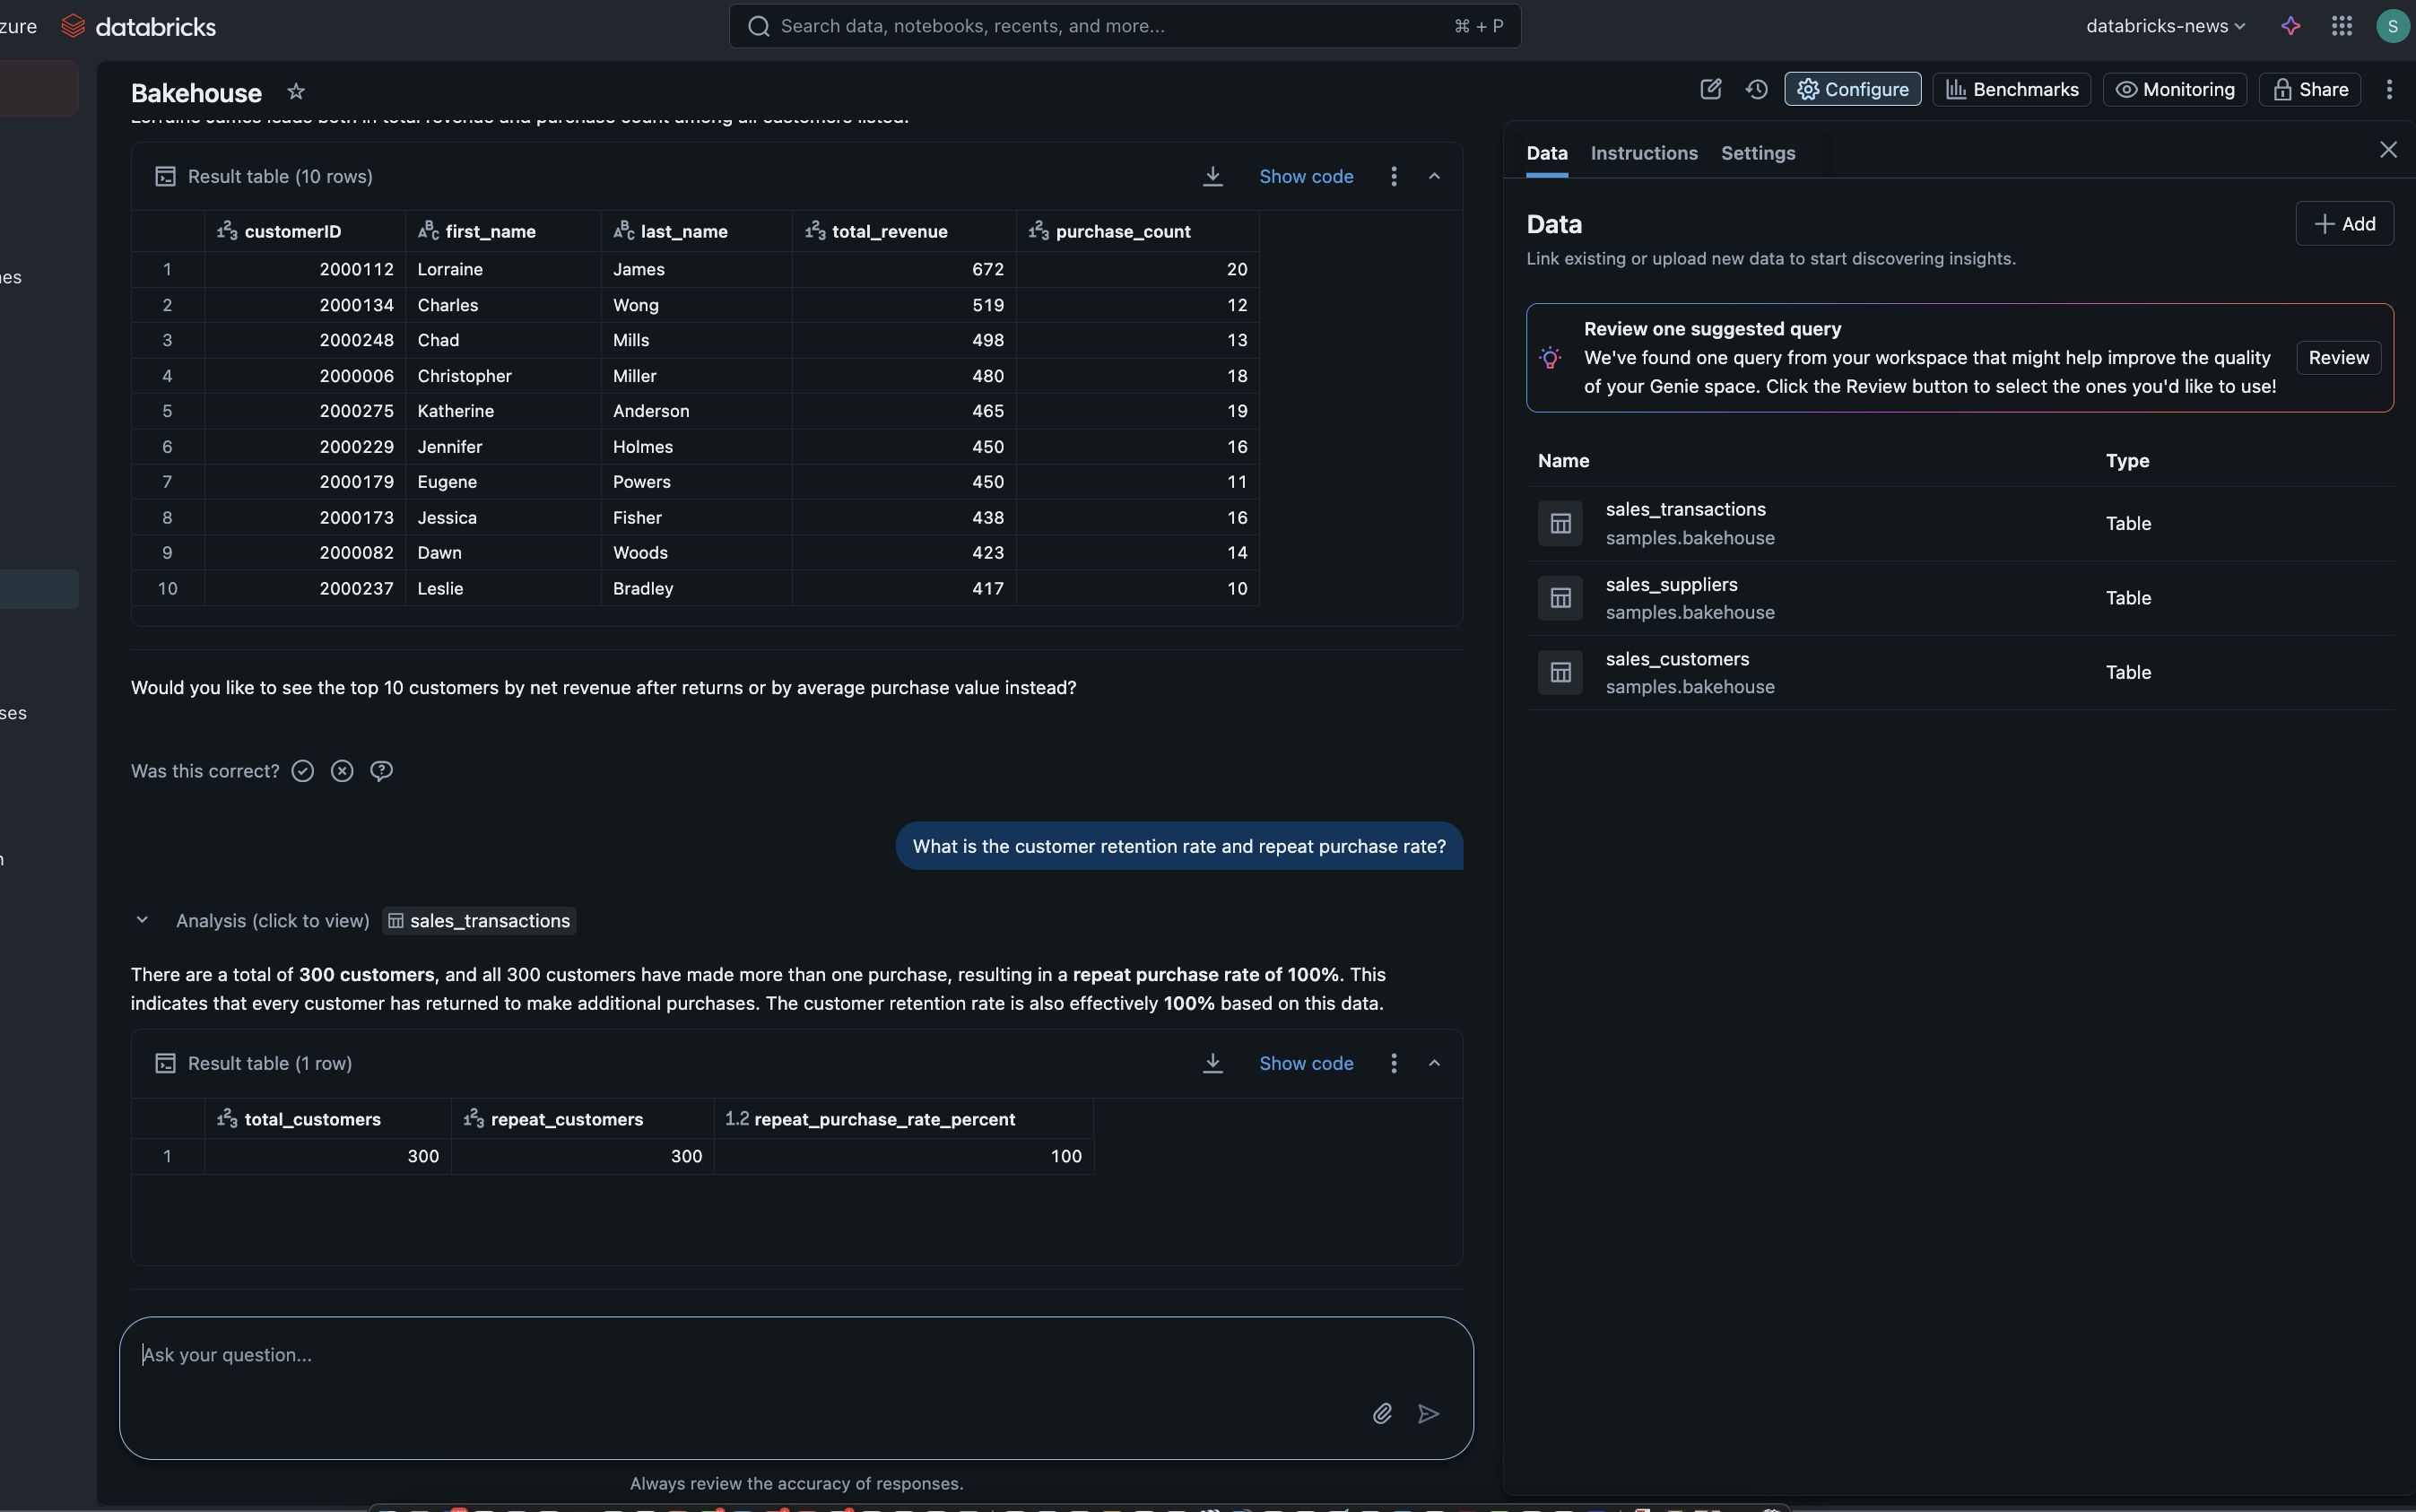
TipVerify Your Genie Space Queries
You can check the actual queries to your Genie space directly by clicking the database link on a slide that will take you to the Databricks UI. This helps validate and verify the AI generated queries being used in TellR.
The underlying Genie space querying Bakehouse data
Step 10: Export and Share
TellR provides two export options via the Export button in the top-right of the slide preview:
HTML — An interactive, self-contained HTML file with live Chart.js visualizations
PDF — A static document for traditional distribution
TipExample Output
Here’s the actual HTML slide deck generated from the Bakehouse dataset in this tutorial. You can scroll through and interact with the charts:
You can also download the PDF version of this presentation.
Tips & Tricks
TipMultiple Profiles
Create different profiles for different use cases — one for executive reviews, another for team updates, another for customer-facing decks. Each can have its own style, and deck prompt.
NoteUnity Catalog Permissions
TellR respects your Unity Catalog permissions. If you can’t see certain data in the Catalog Explorer, TellR won’t be able to query it either. This means your presentations are always within your governance boundaries.
Cleanup & Cost Management
ImportantStop Resources to Avoid Costs
Once you’re finished with this tutorial, make sure you stop the following resources to avoid incurring unnecessary costs:
Stop the Lakebase — Navigate to SQL Warehouses in your workspace and stop the Lakebase database (tellr-db) that was created during installation
Stop the Databricks App — Go to Apps, find the tellr app, and stop it
Stop the Genie data warehouse — The Genie space uses an attached SQL warehouse; make sure it is stopped as well
You should also consider deleting the Genie space you created if you no longer need it, as an active Genie space with an attached warehouse can continue to incur compute costs.